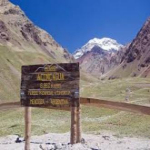
Mount Aconcagua Trekking Guide:
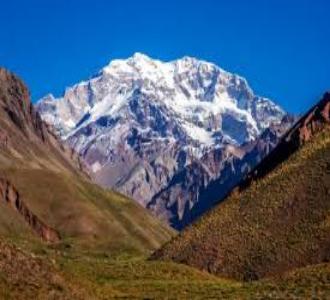
Overview: A journey to the roof of South America is no mean feat — along the way you will encounter challenging conditions, be tested by extreme altitude and face the perils of mother nature — all of which combine to make reaching the top of Mount Aconcagua a formidable endeavor.
Yet, with proper planning and training, standing on the roof of South America is achievable — with knowing and being prepared for what lies ahead being a significant factor in successfully and safely reaching the summit.A key part of this is being familiar with the three main routes to the top of Mount Aconcagua:
Normal Route (Northwest Ridge): The most common and least technical path.
Polish Traverse: A longer, more scenic route that approaches from the east and merges with the Normal Route.
Polish Glacier Route: A highly technical ice-and-snow climb suitable only for experienced alpinists.
So to make your path to the summit of Mount Aconcagua as easy as possible, we’ve rounded out a short guide for each of these three routes, beginning with the the most popular normal route below:
Mount Aconcagua: The Normal Route — Trekking Guide:
The Normal Route is the most popular and least technical way to summit Mount Aconcagua, making it the ideal choice for trekkers and high-altitude hikers aiming for their first 7,000-meter peak. While it doesn’t require advanced mountaineering skills, it demands solid physical conditioning, mental grit, and good acclimatization. The route typically takes between 16 to 20 days, allowing for essential rest and acclimatization stops along the way. With a mix of rugged terrain, vast Andean landscapes, and windswept high camps, it offers a challenging but accessible path to the summit — and the detailed day-by-day breakdown below walks you through exactly what to expect on this epic journey:
Day 1: Arrival in Mendoza (746 m / 2,448 ft)
Your Aconcagua adventure begins in Mendoza, Argentina—a sun-drenched city known for its wine and vibrant street life. Before you even glimpse the mountain, you’ll be immersed in the local energy as you check into your hotel, visit the permit office, and start sorting out final gear logistics. This day is mostly administrative but also a gentle mental warm-up for what lies ahead. Enjoy one last steak dinner and glass of Malbec—you won’t have anything close to this luxury for a while.
Day 2: Drive to Penitentes / Las Cuevas (2,580 m / 8,465 ft)
After breakfast, you hit the road on a scenic drive through the Andes towards Penitentes, a small outpost that serves as a staging ground for Aconcagua climbers. The transition from city to high mountain landscape is dramatic—vineyards give way to jagged peaks and desert plateaus. Once in Penitentes, you’ll check into a lodge, finalize mule loads, and go over your plan with your guide. At this point, the anticipation becomes very real—gear is checked, repacked, and double-checked again.
Day 3: Hike to Confluencia Camp (3,400 m / 11,155 ft)
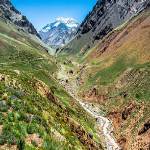
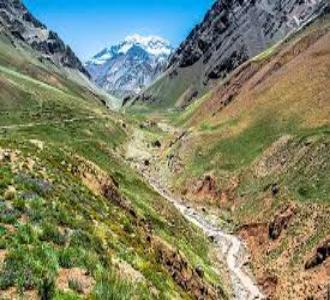
You begin your hike by entering Horcones Valley, where a ranger checks permits. The trail to Confluencia is not difficult, but the dry, dusty terrain and sun exposure make it feel more strenuous. After 3–4 hours, you arrive at your first base camp, where domed tents and medical staff await. The camp is surrounded by towering red cliffs and the ever-imposing presence of the Andes. This is your first taste of camp life—sleeping in tents, filtering water, and adapting to a high-altitude routine.
Day 4: Acclimatization Hike to Plaza Francia (4,000 m / 13,123 ft)
This day is all about acclimatization. You’ll leave most of your gear behind and take a light pack up to Plaza Francia, the base of the imposing South Face of Aconcagua. This steep out-and-back hike is your first real test at altitude, and the views of the glacier-covered wall are unforgettable. Expect to feel your heart pounding faster than usual. The return to Confluencia feels easier, and you’ll be grateful for a hot meal and rest. This day plays a crucial role in your success higher up.
Day 5: Trek to Plaza de Mulas Base Camp (4,370 m / 14,337 ft)
Today is long—roughly 7 to 10 hours of hiking up a desolate, Martian-like valley called Playa Ancha. The lack of shade and high altitude make every step feel like a slog, especially the final ascent known as the “Cuesta Brava” or “Tough Slope.” When you finally reach Plaza de Mulas, the largest base camp in the southern hemisphere, the sense of accomplishment is huge. Your tents will be ready, and hot soup is often waiting for you. This is your home for the next several days.
Day 6: Rest Day at Plaza de Mulas
Your body needs this. Acclimatizing at over 4,000 meters is no joke. You’ll likely spend the day sleeping in, hydrating aggressively, and letting your body catch up to the altitude. Some climbers do a short walk or yoga session, while others get medical checks from the camp doctors. The views here are stunning—you’ll see Mount Cuerno and glaciers glittering in the sun. Socializing with other climbers and journaling the journey so far are great ways to pass the time.
Day 7: Acclimatization Hike to Cerro Bonete (5,000 m / 16,404 ft)
This climb to nearby Cerro Bonete offers a stunning viewpoint and a great physiological benefit. You’ll gain almost 700 meters and descend in the same day, which stimulates red blood cell production. The hike is scenic, with sweeping views back down to Plaza de Mulas and across the sprawling Andes. This is also a confidence booster—standing at 5,000 meters and feeling strong bodes well for what’s ahead. Back at base camp, you’ll feel more prepared than ever.

Day 8: Carry Gear to Camp 1 (Canada Camp – 5,050 m / 16,564 ft)
Today you shoulder a heavy pack and make your way up to Camp 1. The goal is to stash gear and acclimatize, not to sleep there yet. The route winds through steep scree slopes and loose rocks, and you’ll feel the altitude with every step. After caching your gear, you descend back to Plaza de Mulas. This “carry high, sleep low” strategy is crucial to your success and health on Aconcagua. Expect to be tired but satisfied by day’s end.
Day 9: Move to Camp 1 (Canada Camp)
Now fully acclimatized, you return to Camp 1 with the rest of your gear and settle in for the night. The sense of progress is motivating—you’re now sleeping higher than most European peaks. The camp sits on a rocky slope with views stretching across the Andes. Despite the cold, the feeling of being in the thick of the mountain is exhilarating. Hydration and calorie intake become even more important at this stage, so hot soup and snacks are essential.
Day 10: Move to Camp 2 (Nido de Cóndores – 5,570 m / 18,274 ft)
The trek to Camp 2 is challenging, both mentally and physically. The route is exposed to wind and sun, and the terrain gets more severe. Nido de Cóndores, or “Condor’s Nest,” offers panoramic views and a haunting sense of vastness. Here, you’ll begin to feel the true remoteness of the high Andes. Most climbers feel some fatigue at this point, so moving slowly, breathing deeply, and taking breaks are essential. Camp setup becomes more minimalist—survival-oriented.
Day 11: Rest Day at Camp 2
This rest day is crucial before pushing higher. By now, the altitude makes everything harder—from putting on boots to boiling water. Your team might go for a short walk, but the main focus is rest and mental preparation. You’ll check weather forecasts, review summit day plans, and double-check your summit pack. It’s a quiet, introspective day, filled with anticipation and a bit of anxiety.
Day 12: Move to Camp 3 (Colera – 5,970 m / 19,586 ft)
This is the final camp before the summit. Colera sits exposed on a high ridge, often battered by wind. The climb up is steep and slow, but the goal feels close. You’ll be sleeping at nearly 6,000 meters tonight, so everything needs to be ready for summit day—water bottles prepped, headlamp batteries checked, layers organized. There’s a sense of camaraderie as climbers from all over the world quietly share space on the edge of the roof of the Americas.
Day 13: Summit Day (6,961 m / 22,838 ft)
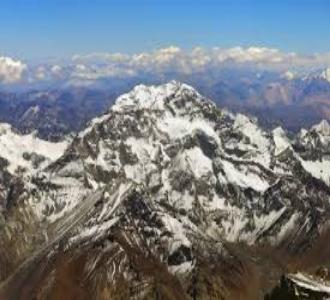
The biggest day of the expedition begins around 3–5 a.m. in freezing temperatures. You climb slowly, headlamps piercing the darkness, up through steep switchbacks to the Independencia Hut. From there, the route traverses the long, exposed traverse called the “Travesía” and then ascends the notorious “Canaleta,” a loose scree slope that seems to go on forever. Every step is exhausting, but eventually you crest the final ridge—and there it is. The summit of Aconcagua. The view stretches from Chile to Argentina. Elation, exhaustion, and awe flood your senses. After 20–30 minutes at the top, you begin the long, careful descent back to Camp 3.
Day 14–15: Descend to Base Camp and Return to Mendoza
You descend rapidly over the next two days—back to Nido, then Plaza de Mulas, and finally all the way to the trailhead. It’s amazing how quickly your body recovers once you start losing altitude. By the time you return to Mendoza, showered and rested, the enormity of what you’ve just accomplished begins to sink in. You summited the highest mountain outside of Asia, tested your limits, and came back stronger.


Mount Aconcagua: The Polish Traverse Route — Trekking Guide:
The Polish Traverse is a spectacular alternative to the Normal Route, offering a more remote and scenic journey to the summit of Aconcagua. Starting from the Vacas Valley and traversing across to join the Normal Route near the summit, it offers a gradual acclimatization profile and quieter trails. This route is ideal for trekkers seeking a slightly more challenging, adventurous experience without the steep technical demands of the Polish Glacier Direct. It generally takes between 16 to 20 days, depending on acclimatization and weather conditions, and is known for its raw natural beauty, solitude, and panoramic views of the Andes. What makes the Polish Traverse especially appealing is its smooth acclimatization progression, which improves summit success rates, and the stunning diversity of terrain you’ll encounter.
Day 1: Mendoza (746 m / 2,448 ft)
Arrive in Mendoza, a vibrant Argentinian city nestled in wine country. Spend the day getting permits sorted, checking gear, and meeting your expedition team. There’s an excitement in the air as climbers from all over the world gather with one goal in mind. Don’t underestimate how important a good night’s sleep and some hearty Argentine food are before the journey begins.
Day 2: Drive to Punta de Vacas (2,400 m / 7,874 ft) and Trek to Pampa de Leñas (2,950 m / 9,678 ft)
After a scenic drive into the Andes, the trek kicks off with a gradual walk through the dry and colorful Vacas Valley. It’s a warm-up day that introduces the vastness of the terrain ahead. You’ll meet mules carrying supplies and set up your first camp in Pampa de Leñas beside a wide river under clear skies. The sense of remoteness begins to sink in.
Day 3: Trek to Casa de Piedra (3,240 m / 10,630 ft)
You continue deeper into the valley, crossing arid plains and winding through riverbeds. The iconic southeast face of Aconcagua finally reveals itself in dramatic fashion as you approach Casa de Piedra. It’s a humbling view—glaciers hanging off the mountain’s flanks, and your first real look at the summit. Camp is set with anticipation building.
Day 4: Trek to Plaza Argentina Base Camp (4,200 m / 13,780 ft)
This is the longest and most demanding day so far. You cross the Vacas River and make a steady, often windy ascent to Plaza Argentina, your main base camp for the coming days. It’s a dramatic transition from dusty valleys to the alpine world. At camp, you’ll set up for several nights, rest, and begin your serious acclimatization process.
Day 5: Rest and Acclimatization at Plaza Argentina
A well-earned rest day is vital for your body to adjust. You’ll spend time hydrating, eating, sorting gear, and doing short hikes around base camp. It’s a good chance to journal, snap some photos, and get to know your fellow climbers. Base camp life has its rhythm—between checking oxygen saturation levels and watching the play of light on the glacier above.\
Day 6: Carry Gear to Camp 1 (4,950 m / 16,240 ft), Return to Base Camp
With light packs, you do a gear carry to Camp 1, following a rocky path and crossing scree slopes. It’s a taste of what’s ahead—thinner air and heavier breathing—but the return to base camp feels luxurious with warm food and proper tents. This climb-high, sleep-low strategy helps immensely with acclimatization.
Day 7: Rest Day at Plaza Argentina
Another rest day lets your body catch up. You’ll feel the altitude now—perhaps a slight headache or breathlessness—but this is normal. Rest, drink lots of fluids, and mentally prepare for moving higher. Watching the stars come out over the Andes is surreal—cold, clear, and utterly vast.


Day 8: Move to Camp 1 (4,950 m / 16,240 ft)
You make your way back to Camp 1 with full packs. The route is familiar but harder with more weight. The landscape becomes more barren—just rock, ice, and wind. Setting up camp at this altitude is a task in itself. But the sunset glow on the peaks around makes it feel worth every step.
Day 9: Carry to Camp 2 (Guanacos Camp, 5,500 m / 18,045 ft), Return to Camp 1
This section introduces steeper scree and relentless switchbacks. You cache food and fuel at Camp 2, then descend back to Camp 1. Despite the altitude, your body is starting to adapt. It’s a physically tough day, but spirits are high with summit day drawing nearer.
Day 10: Move to Camp 2 (Guanacos Camp)
Ascending again with full packs is slower and heavier. You feel the altitude in every step. Camp 2 is exposed and stark—just a cluster of tents under the wide sky. The views are immense. You’re now above the cloud line, and everything feels closer to the edge of the world.
Day 11: Rest Day at Camp 2
This day is essential. At over 5,500 meters, the body needs time to adjust. Hydration, sleep, and mental preparation become the main activities. You eat high-calorie meals and spend time inside your tent, listening to the wind howling like a freight train. You’re in the alpine zone now.
Day 12: Move to Camp 3 (Colera Camp, 5,970 m / 19,586 ft)
This is a short but steep push to your high camp, where the Polish Traverse joins the Normal Route. It’s a dramatic ridgeline spot, often windy, perched with panoramic views over the Andes. You feel both awe and anxiety—this is your final camp before the summit.
Day 13: Summit Day (6,961 m / 22,838 ft)
You start in the dark, around 4 AM, layered in everything you’ve got. The ascent follows the same route as the Normal Route from this point, zigzagging up to the Independencia Hut and then the long traverse to the Canaleta. The air is razor thin, and every step feels monumental. The final push up the Canaleta is steep and slow, but the moment you reach the summit—the roof of the Americas—is unforgettable. Tears, cheers, photos, and the vastness of Argentina spread below. Then comes the equally grueling descent back to Camp 3.
Day 14: Descend to Plaza de Mulas Base Camp (4,300 m / 14,108 ft)
You descend via the Normal Route, taking the long, dusty trail past Berlin and Nido de Cóndores camps, eventually dropping into Plaza de Mulas. It’s a long, painful day on tired legs, but the thicker air at base camp is a gift. You’re met with cheers, warm drinks, and a huge sense of relief.
Day 15: Trek out to Horcones and Return to Mendoza
A final walk out the Horcones Valley is your victory lap. You follow a wide, dusty trail surrounded by stark, surreal landscapes. At the roadhead, vehicles wait to take you back to Mendoza, where cold drinks, hot showers, and a soft bed await.


Mount Aconcagua: The Polish Glacier Route — Trekking Guide:
The Polish Glacier Route is the most technically demanding and remote of Aconcagua’s three main ascent routes. Unlike the Normal Route or the Polish Traverse, this path leads straight up the icy face of the Polish Glacier, requiring mountaineering experience, proper gear, and a high tolerance for cold, altitude, and exposure. It’s not for the faint of heart, but for those with the skill and the spirit, it offers an unforgettable and seldom-traveled route up South America’s highest peak. This is Aconcagua at its wildest, and most rewarding.
Most climbers begin by following the Polish Traverse for the first several days to acclimatize and establish base camps before veering off the standard traverse and climbing the glacier itself. Expect solitude, rugged beauty, and a very real sense of adventure. The route is typically completed in 17 to 21 days, depending on weather, acclimatization needs, and glacier conditions.
Day 1: Mendoza (746 m / 2,448 ft)
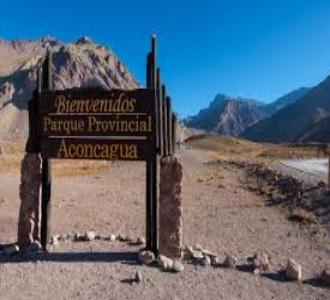
The adventure begins in the city of Mendoza. After sorting out your permit at the Aconcagua Provincial Park office and doing some final gear checks, the rest of the day is spent preparing logistics, grabbing fresh food, and making any last-minute tweaks to your loadout. Mendoza has great energy—sunny, wine-scented air and busy sidewalks—but there’s a quiet buzz of nerves, too. Tomorrow, the mountain calls.
Day 2: Mendoza to Penitentes (2,580 m / 8,465 ft)
A long drive winds west through the dusty plains and foothills of the Andes. By the time you reach Penitentes, the mountains loom impressively. It’s a good place to double-check equipment and hand off gear to the mules who will carry loads to Base Camp. The night is usually spent in a basic lodge, with mountain air already biting cooler than Mendoza.
Day 3: Penitentes to Pampa de Leñas (2,950 m / 9,678 ft)
After registering with park rangers at Horcones, the trekking begins. The landscape is vast, dry, and dramatic. The trail follows the Relinchos and Vacas Rivers through dusty valleys under a blazing sun. By late afternoon, you reach Pampa de Leñas—your first campsite. Mules unload, tents go up, and a group dinner marks the beginning of the real mountain life.
Day 4: Pampa de Leñas to Casa de Piedra (3,240 m / 10,630 ft)
A longer but relatively gentle hike continues deeper into the Vacas Valley. You’ll cross rivers, pass grazing guanacos, and catch your first glimpse of Aconcagua’s eastern face—your objective. It’s humbling. At Casa de Piedra, you can see the Polish Glacier shimmering high above. Excitement and a hint of apprehension kick in.
Day 5: Casa de Piedra to Plaza Argentina Base Camp (4,200 m / 13,780 ft)
This day involves a steep gain in altitude and effort as you climb up the Relinchos Valley. The trail steepens considerably, with loose scree and exposure to wind and sun. Eventually, you crest into Plaza Argentina—your base for the coming acclimatization period and the base of the Polish Glacier route. The camp is bustling but smaller and quieter than Plaza de Mulas on the Normal Route.
Day 6–8: Acclimatization Days at Plaza Argentina
These days are critical. You’ll take light hikes up surrounding ridges, ferry gear to higher camps, and rest between exertions. The air is thinner, and headaches, loss of appetite, and fatigue become part of daily life. Everyone feels the elevation in some way. But the views—of icy faces, blue skies, and swirling clouds—make it all worthwhile.
Day 9: Plaza Argentina to Camp 1 (5,000 m / 16,404 ft)
You start to climb in earnest. The trail from Base Camp is steep and filled with loose rock, but manageable. Camp 1 is on a rocky platform with incredible views back down the valley. You’ll likely sleep light and listen to the wind whistle through your tent guy lines.’
Day 10: Rest or Carry to Camp 2 (5,500 m / 18,045 ft)
Depending on your acclimatization, today can be a rest day or a gear-carry up to Camp 2, which sits beneath the imposing face of the glacier. The goal is to prepare your body and mind for the tougher days ahead.
Day 11: Camp 1 to Camp 2
Now you’ve got altitude, exposure, and fatigue working against you. Every step up to Camp 2 is slower, and the wind seems to have more bite. The snow and ice fields come into view as you climb higher onto the glacier’s flanks.
Day 12: Camp 2 to Camp Colera (5,970 m / 19,586 ft)
Though some climbers establish a separate Polish Glacier high camp, many make the traverse across the upper mountain to Camp Colera. This high camp is shared with climbers from the Normal and Traverse routes. From here, the glacier route diverges steeply upward. You spend the afternoon preparing ropes, gear, and mentally reviewing your climb.
Day 13: Summit Day (6,962 m / 22,841 ft)
An alpine start under starry skies. The ascent of the Polish Glacier is steep and committing. You’ll move as a rope team, navigating icy slopes and crevasses. Ice axes, crampons, and technical climbing skills are essential. It’s brutally cold and the air feels razor-thin. Hours pass in slow, grinding motion. The final stretch joins the Normal Route near the summit ridge. And finally, the summit—a flat, rocky plateau with a metal cross—comes into view. The world opens beneath you, and it’s utterly humbling.
Day 14–17: Descent and Return
Most climbers descend via the Normal Route, spending a night at Camp Colera and then Plaza de Mulas. The descent is faster but equally demanding on tired legs and aching backs. From Plaza de Mulas, it’s a long hike to Horcones and a return to Penitentes and Mendoza. Clean clothes, cold drinks, and a real bed await—but so does a new sense of accomplishment. The glacier route takes everything you’ve got, and it gives back more than you expect.