Mount Denali Trekking Guide:
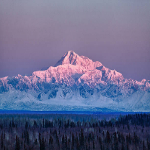
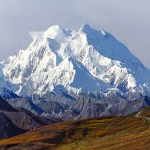
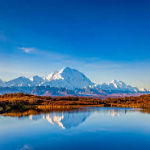
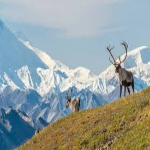
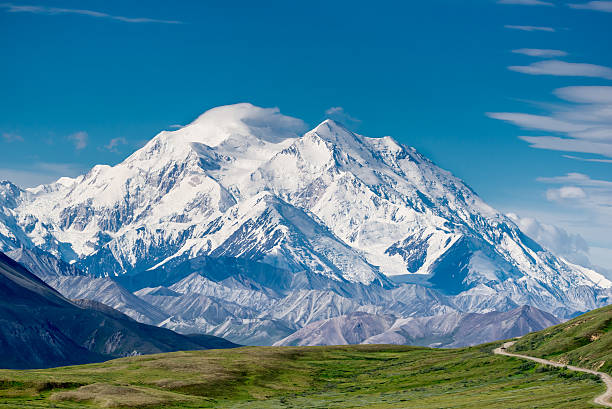
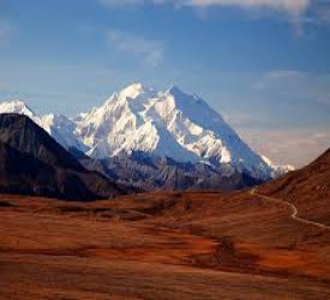
Overview: At 20,310 feet (6,190 meters), Mount Denali dominates the Alaskan skyline and stands as the highest mountain in North America. Formerly known as Mount McKinley, Denali means “The High One” in the Koyukon Athabaskan language—and it lives up to that name in every way. Denali is not only massive in height but also in isolation, remoteness, and sheer environmental intensity. Climbers who tackle this peak must be prepared for arctic conditions, deep snow, high winds, and brutally cold nights.
Unlike many other high mountains around the world, Denali is a true wilderness expedition. There are no lodges, porters, or infrastructure. You haul your own sled, carry all your gear, set your own camps, and make your own decisions. This makes the Denali experience one of the purest and most self-reliant big mountain adventures on the planet.
Denali is not technically the most difficult peak to climb—but it is psychologically and physically punishing. Altitude, extreme weather, and isolation combine into one unforgettable, often brutal challenge.With there being three main routes to its might summit:
- Standard Route (West Buttress route): The most common route taken on by 90% of climbers.
- West Rib Route: A technical and challenging route — requiring advance climbing and often taken 25 days to complete.
- Cassin Ridge: A highly technical and challenging route — that is only suitable for the most advanced alpine climbers.
So, whether you’re aiming to climb the classic West Buttress route, take on the bold West Rib, or try the remote and demanding Cassin Ridge, you’re in for an unforgettable journey — and our guides below are here to ensure you reach the summit of Mount Denali as easily and safely as possible:
Route 1: West Buttress Route (Standard Route) Trekking Guide:
The West Buttress is the most popular and well-established route up Denali, with roughly 90% of climbers attempting the summit via this path. It’s considered a non-technical glacier climb, though it requires excellent mountaineering skills, crevasse rescue proficiency, high-altitude conditioning, and full expedition-style self-sufficiency.
- Duration: 18–24 days
- Distance: Approx. 34 miles round-trip
- Elevation Gain: 13,000+ ft (starting from the Kahiltna Glacier)
- Technical Difficulty: Moderate (Alpine Grade II–III)
- Best Season: May–early July
Day-by-Day Climbing Guide
Day 1 – Fly to Kahiltna Glacier Base Camp (7,200 ft / 2,195 m)
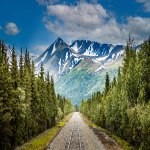
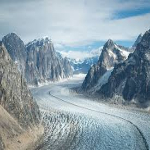
The expedition kicks off with a breathtaking flight from Talkeetna to the Kahiltna Glacier, giving you an aerial preview of Alaska’s immense wilderness. After landing at 7,200 feet, climbers unload gear and establish Base Camp amid vast fields of snow and ice. There’s a palpable buzz among teams setting out. Some groups will take a short acclimatization hike or practice crevasse rescue techniques nearby. The glacier’s stillness is broken only by the occasional plane landing or a distant avalanche.
— — —
Day 2 – Move to Camp 1 (7,800 ft / 2,377 m)
The first real step onto the mountain begins with a rope-team traverse down Heartbreak Hill and onto the expansive Kahiltna Glacier. It’s a relatively low-angle ascent, but the full sled loads and soft snow can make it a tough introduction. The route is approximately 5 miles and usually takes 4–6 hours, depending on snow conditions. Rope spacing and crevasse awareness are key here, as hidden slots dot the glacier. Camp 1, set up near 7,800 feet, is a flat area that offers stunning views down-glacier and a good place to fine-tune your camp setup for the bigger days ahead.
— — —
Day 3 – Cache Gear at 9,600 ft / Return to Camp 1
With the “carry high, sleep low” strategy, you’ll pack up a portion of your gear and ascend Ski Hill, a steeper slope that marks your first big elevation gain. The climb up to 9,600 ft offers increasing exposure and requires stamina, but you’ll move more efficiently without a full load. Once the cache is buried and marked, the team will descend back to Camp 1. It’s a tiring but vital acclimatization step, helping your body adjust and spreading the workload. On the return, the slope feels longer, but spirits are often high with progress being made.
— — —
Day 4 – Move to Camp 2 (11,000 ft / 3,353 m)
With fresh legs and lighter sleds, you’ll move past your 9,600 ft cache and continue the climb to Camp 2. This section includes the full length of Ski Hill and steeper sections near the top. Views begin to open dramatically, and you’ll notice the temperature starting to drop as you gain altitude. Camp 2 is located in a scenic basin at 11,000 ft with excellent natural wind protection and usually well-built snow walls left by earlier teams. It’s a beautiful but colder environment, where nights often dip well below freezing. Expect a 6–7 hour day.
— — —
Day 5 – Cache Gear at Windy Corner (13,500 ft) / Return to Camp 2
Today is a hard push and a key acclimatization step. The route from Camp 2 winds up Motorcycle Hill—a steep and often icy climb—and then up Squirrel Hill, which traverses a slope prone to rockfall. From there, you’ll reach the infamous Windy Corner, where strong crosswinds can appear without warning. This is one of the most exposed sections of the entire route, and you’ll cache gear just beyond it. The descent back to Camp 2 is quicker but can be mentally draining after the exposure and technical terrain. Avalanche danger can exist here, so timing and conditions are crucial.
— — —
Day 6 – Rest Day at Camp 2
A day off at 11,000 ft provides a much-needed opportunity for rest and acclimatization after several days of heavy movement. Most climbers spend the day reinforcing tents, digging snow walls, and eating calorie-dense meals. Hydration is critical at this altitude, so melting plenty of snow and drinking constantly becomes part of the routine. It’s also a good time for group check-ins, gear repairs, and reviewing upcoming technical sections. Clear nights here reveal stunning views of the stars above the Alaska Range.
— — —
Day 7 – Move to Camp 3 (14,200 ft / 4,328 m)
This is a major milestone. You’ll again pass Motorcycle and Squirrel Hills, navigate around Windy Corner, and then press upward into Genet Basin. With the full load and the effects of altitude, it’s a tough day—expect 6–8 hours of effort. Camp 3 is a large, flat plateau and the main hub for high-altitude operations on the mountain. It has the feel of a small village, with many teams building elaborate snow walls and communal kitchen areas. From here, the route steepens considerably, and conditions tend to become more serious. This is where many teams take extended rests before going higher.
— — —
Day 8 – Back-Carry from Windy Corner Cache
The team descends partway back to Windy Corner to retrieve the cached gear and carry it back up to Camp 3. It’s a shorter day, but still involves nearly 2,000 ft of elevation change and takes 3–4 hours. It’s also a good day to continue acclimatizing, eat well, and prepare for the demanding climb up the Headwall in the coming days. Climbers often use this day to start wearing high-altitude boots and testing summit layers for comfort and fit.
— — —
Day 9 – Cache Gear Above the Headwall (~16,200 ft)
This is one of the most physically demanding days so far. The team ascends to the Headwall, where fixed lines are anchored into the steep slope. Using mechanical ascenders, you’ll climb up 800 vertical feet of 45-degree snow and ice with exposure below. Once you reach the ridge at 16,200 ft, you’ll cache food and fuel in a protected spot. The views from here are staggering, with Mount Foraker looming across the valley. After caching, you descend back to 14 Camp to rest and hydrate. Expect a 6–8 hour day.
— — —
Day 10 – Rest/Weather Day at Camp 3
Another strategic rest day, either for physical recovery or to wait out poor weather. It’s not uncommon to sit tight for 2–3 days at this altitude due to snowstorms or high winds higher up the route. Teams keep busy by reinforcing their camps, practicing rope skills, and planning summit logistics. Patience becomes a vital part of the mental game.
— — —
Day 11 – Move to High Camp (17,200 ft / 5,243 m)
This is the crux move before summit day. After ascending the Headwall once more via the fixed lines, you’ll continue along the narrow West Buttress Ridge, which is airy and exposed. With stunning drop-offs on either side and winds that can be fierce, this section demands total focus. Reaching High Camp at 17,200 ft feels monumental. It’s stark, cold, and often battered by wind. Tent walls must be reinforced immediately, and teams quickly get into dry layers to conserve body heat.
— — —
Day 12 – Rest Day at High Camp
A full day to rest and prepare for the summit. The air is thin, movements are slow, and everything—from boiling water to zipping up a jacket—feels harder. The goal here is to eat, hydrate, and mentally steel yourself for the 3,000-foot ascent to the summit. Team leaders review summit plans, route features, turnaround times, and emergency contingencies.
— — —
Day 13 – Summit Day (20,310 ft / 6,190 m)
Summit day starts early—often before 6 a.m.—to maximize the daylight window. The route climbs Denali Pass, crosses the icy Autobahn with fixed protection, and reaches the Football Field—an eerie, flat expanse at 19,500 ft. From there, you’ll climb Pig Hill and finally reach the knife-edge summit ridge. The views are unrivaled—the highest point in North America unfolds a panorama of glaciers, peaks, and clouds. Weather is always a concern here, so teams move efficiently, with summit days often taking 10–14 hours round trip.
— — —
Day 14 – Extra Summit Day (Weather Buffer)
An extra day at High Camp in case the previous day’s conditions weren’t favorable. High winds, whiteouts, or extreme cold often force teams to wait. While this day can feel monotonous or stressful, having the patience to wait for a safe window is essential to success—and survival.
— — —
Day 15 – Descend to 14 Camp
The descent back to 14,200 ft is physically easier but mentally exhausting. The steep terrain of the Headwall and the exposed ridges require full attention. Back at 14 Camp, oxygen levels are noticeably more generous, and the body begins to recover. Hot drinks and real food boost morale.
— — —
Day 16 – Descend to Camp 1 (or Base Camp)
Depending on conditions and team strength, some groups make the long trek all the way to Base Camp in a single day, while others stop to camp at 11,000 ft or 7,800 ft. Descending with sleds requires coordination and caution—particularly over snow bridges and crevasse-prone areas that have warmed up since the climb began.
— — —
Day 17 – Return to Base Camp
You’ll cover the final stretch of glacier back to Base Camp. If visibility is good and the landing strip is open, the bush plane might pick you up that same day. Otherwise, you may camp one more night. After nearly three weeks on the mountain, the thought of fresh food, a shower, and a cold beer feels surreal.
— — —
Day 18–21 – Weather Days / Flight Out Buffer
Denali is notorious for weather delays—especially at the end of an expedition. Climbers often spend extra days at Base Camp waiting for a safe flying window. Use this time to reflect, write in your journal, or trade stories with other climbers. You’ve just completed one of the world’s most iconic alpine ascents.
— — —


Route 2: West Rib Route Trekking Guide:
The West Rib is a more technical and demanding route than the West Buttress, featuring steeper snow climbing, ice pitches, and a greater sense of exposure. It’s a favorite among experienced alpinists looking for a serious challenge without the ultra-committing nature of the Cassin Ridge.
- Duration: 18–25 days
- Elevation Gain: 13,000+ ft (starting from the Kahiltna Glacier)
- Technical Difficulty: Advanced (Alpine Grade III–IV)
- Best Season: Mid-May to early June
Day-by-Day Climbing Guide
Day 1 – Fly to Kahiltna Glacier Base Camp (7,200 ft / 2,195 m)
The adventure begins with a scenic flight from Talkeetna to the Kahiltna Glacier, where you’ll land at 7,200 feet. This is your first exposure to the immense scale of Denali’s terrain. Upon landing, teams unload and prepare to establish Base Camp. While some climbers spend the first day setting up tents and sorting gear, others may take short excursions to familiarize themselves with the glacier and practice crevasse rescue skills. The feeling of remoteness on the glacier sets the tone for what lies ahead, with towering peaks and endless snowfields in every direction.
— — —
Day 2 – Move to Camp 1 (7,800 ft / 2,377 m)
The first official push of the expedition takes you up the gentle incline of the Kahiltna Glacier toward Camp 1. This is a short but crucial day, as it gives climbers the opportunity to adjust to glacier travel, roping up for crevasse danger, and pulling sleds. The 600-foot elevation gain is not much, but the work of hauling sleds through deep snow can make it feel longer. Camp 1 is a large, flat area at 7,800 feet that provides good protection from winds and a place to rest. The team will likely spend the night here, taking in views of the surrounding peaks.
— — —
Day 3 – Move to Camp 2 (10,200 ft / 3,109 m)
After breakfast, the team moves on, crossing the gentle terrain of the Kahiltna Glacier before beginning to climb up a section known as the “Shallow Cleft.” The route will gradually steepen as you approach the base of the West Rib itself. The climb to 10,200 feet is challenging, with long stretches of rope-team travel and occasional crevasse crossings. The last stretch before Camp 2 is often steeper, requiring everyone to use their crampons and ice axes more actively. At Camp 2, climbers settle into an area sheltered from the wind, often surrounded by the beauty of untouched snow fields and distant peaks. Expect a 5–7 hour day.
— — —
Day 4 – Rest and Acclimatization Day at Camp 2
Today is set aside for acclimatization and resting. The 10,200 ft altitude makes it crucial to give your body a chance to adapt. Resting here, climbers tend to reinforce snow walls around their tents, hydrate, and ensure all equipment is ready for the next phase. Team leaders may also take time to review summit strategies, weather windows, and contingency plans. Some climbers will also melt snow for water, while others take the opportunity to stretch and rest. Mental preparation is just as important as physical rest during this phase of the climb.
— — —
Day 5 – Move to Camp 3 (13,500 ft / 4,115 m)
The route from Camp 2 to Camp 3 involves a strenuous climb up the West Rib, known for its steeper slopes and technical terrain. The ascent requires efficient teamwork, as climbers are roped together, navigating around rock outcrops, and ascending sections that are often covered with firm snow and ice. The first major challenge is the “Icefall,” which requires caution due to the risk of crevasse falls and shifting ice. Reaching Camp 3 at 13,500 feet is a significant accomplishment. The camp is nestled in a series of rock outcroppings that offer some protection from the wind. Climbers will often feel the effects of altitude here, and rest is essential. Expect a 6–8 hour day.
— — —
Day 6 – Cache Gear at 14,200 ft / Return to Camp 3
Climbers will carry extra gear and provisions to an altitude of 14,200 feet before returning to Camp 3. This “carry high, sleep low” strategy helps climbers acclimatize by exposing them to higher altitudes without the strain of carrying heavy loads for extended periods. The climb to 14,200 feet involves passing over technical sections with exposed ridgelines and occasional rock climbing. Once the cache is stashed, climbers descend back to Camp 3. This day is typically shorter in duration but still requires effort, as the terrain is demanding. It’s a day to get used to the higher altitude while ensuring that gear and food are ready for future high-altitude pushes.
— — —
Day 7 – Rest Day at Camp 3
After the physically demanding carry to 14,200 feet, a rest day at Camp 3 is essential for recovery. This gives the body time to adjust to the increased altitude and allows climbers to check their gear and make any necessary repairs. The mental aspect of the climb is often just as draining as the physical effort. Resting at Camp 3 provides a good opportunity to bond with teammates, review the route ahead, and ensure everyone is physically prepared for the higher elevations and more technical sections.
— — —
Day 8 – Move to Camp 4 (16,200 ft / 4,939 m)
The climb from Camp 3 to Camp 4 is one of the most challenging days of the entire West Rib route. Climbers ascend steep snow and ice slopes that require a combination of technical skills—ice climbing, fixed-line ascents, and rope management. The route also crosses several crevasses, and the effects of altitude begin to make every step feel more labored. Once at Camp 4, climbers will set up in an exposed basin. The winds can be severe here, so tents must be well-secured, and snow walls are often built for extra protection. The day’s effort will take approximately 7–9 hours.
— — —
Day 9 – Rest and Acclimatization at Camp 4
At 16,200 feet, the importance of acclimatization is becoming clear. Resting and hydrating are critical, as the air becomes thinner and harder to breathe. Team leaders will likely discuss the final push toward the summit and plan the logistics of summit day. This rest day is spent checking gear, reviewing climbing techniques, and ensuring that everyone is prepared for the summit push. Climbers are encouraged to stay active with light stretching, but the primary focus is on conserving energy. The night is spent in the harsh, high-altitude environment, where temperatures can drop drastically.
— — —
Day 10 – Move to High Camp (17,200 ft / 5,243 m)
The push from Camp 4 to High Camp is steep, challenging, and often slow. The route requires navigating mixed terrain—snow, ice, and rocky ridgelines. As climbers approach 17,200 feet, the effects of altitude become increasingly pronounced, and the air grows even thinner. Upon reaching High Camp, climbers settle into an exposed spot on a ridge. This camp is considered the final staging area for summit day and is located at the base of the final ascent to the summit. Wind, low temperatures, and the occasional snowstorm can make this camp feel inhospitable, but climbers press on with one goal in mind: the summit of Denali.
— — —
Day 11 – Rest Day at High Camp
With summit day ahead, a day of rest at High Camp is essential. This is a time to prepare mentally and physically. Climbers spend time ensuring their gear is ready, reviewing summit strategies, and ensuring they have enough food, water, and layers for the final ascent. The weather is always a concern, as storms can appear without warning, and teams may be forced to wait for a safe summit window. The atmosphere at High Camp is often quiet—everyone knows the enormity of what lies ahead.
— — —
Day 12 – Summit Day (20,310 ft / 6,190 m)
Summit day begins early, typically before dawn, to maximize daylight hours. The climb is a series of steep, technical sections that require climbers to use fixed lines, crampons, and ice axes. Climbers ascend the final few thousand feet of the West Rib, which involves navigating the “Autobahn”—a 45-degree slope that can be covered in ice and snow. The summit ridge, a knife-edge expanse at 20,310 feet, is one of the most dramatic in the world. After hours of climbing, you reach the summit—Denali’s high point and the highest peak in North America. The views are incomparable, with glaciers, valleys, and peaks stretching as far as the eye can see. Expect a 10–14 hour day, depending on conditions.
— — —
Day 13 – Extra Summit Day (Weather Buffer)
An extra summit day is included as a weather buffer, in case the previous day’s conditions were not conducive for a safe summit attempt. Denali’s weather is notoriously unpredictable, and delays are common. This day is spent waiting for the right conditions, preparing mentally, and checking gear. Weather can change quickly at high altitudes, so climbers stay vigilant and prepared for a summit attempt at a moment’s notice.
— — —
Day 14 – Descend to Camp 4
After a successful summit, the descent begins. The route down to Camp 4 involves retracing steps over the West Rib and returning to familiar terrain, such as the steep snow slopes. Descending with sleds and gear can be tricky, requiring careful navigation to avoid snow bridges and crevasses. Camp 4 provides a much-needed resting place, and after the summit push, climbers often feel relief and exhaustion in equal measure.
— — —
Day 15 – Descend to Camp 2 (10,200 ft / 3,109 m)
Descending the West Rib is physically taxing, but it’s usually faster than climbing up. The route descends to Camp 2, passing familiar features like the Icefall and Shallow Cleft. The steep snow and ice sections require careful control, and teams are cautious of potential rockfall. Reaching Camp 2 feels like a significant milestone, with climbers feeling the weight of their accomplishments and anticipating the final descent to Base Camp.
— — —
Day 16 – Descend to Base Camp (7,200 ft / 2,195 m)
The final leg of the journey brings climbers back to Base Camp at 7,200 feet. The route down the Kahiltna Glacier is less demanding, but there are still crevasses and the occasional tricky section of snow. Reaching Base Camp marks the end of an epic climb. The thought of fresh food, a shower, and the feeling of success are intoxicating after weeks of exertion.
— — —
Day 17–21 – Weather Buffer / Flight Out
Depending on weather conditions, climbers may spend additional days waiting for a flight back to Talkeetna. Denali’s weather can be unpredictable, so it’s wise to plan for potential delays. The wait at Base Camp offers a final opportunity to reflect on the experience, trade stories with fellow climbers, and prepare for the return home.
— — —

Route 3: Cassin Ridge Route Trekking Guide:
The Cassin Ridge is Denali’s most iconic technical line—a 5,000-foot alpine masterpiece that rises straight up the South Face from the Kahiltna Glacier. It’s fast, steep, bold, and isolated. This is a serious climb for serious alpinists only.
- Duration: 7–10 days (including approach)
- Technical Difficulty: Advanced to Extreme (Alpine Grade V)
- Best Season: Mid-May to mid-June
- - Style: Alpine (no fixed camps, minimal bivouacs)
Day-by-Day Climbing Guide
Day 1 – Fly to Kahiltna Glacier Base Camp (7,200 ft / 2,195 m)
The Cassin Ridge climb begins with a scenic flight from Talkeetna to Kahiltna Glacier, where you’ll land at 7,200 feet. Once landed, climbers prepare for the journey ahead by setting up Base Camp, checking gear, and adjusting to the high-altitude conditions. The first day is relatively light in terms of climbing, but it’s essential to acclimatize and plan out the logistics for the next few weeks. Many teams will use the time to practice crevasse rescue techniques and test out their sleds, ensuring everything is in order before the ascent begins.
— — —
Day 2 – Move to Camp 1 (7,800 ft / 2,377 m)
The first actual push of the climb is a relatively short 600-foot ascent from Base Camp to Camp 1 on the Kahiltna Glacier. It’s a relatively gentle climb but still requires careful navigation of crevasses. Once at Camp 1, climbers begin the process of setting up their tents and getting used to glacier travel. This early part of the expedition is all about managing your loads, building confidence in rope-team travel, and getting used to the rhythm of the climb.
— — —
Day 3 – Move to Camp 2 (10,000 ft / 3,048 m)
From Camp 1, climbers move toward the Cassin Ridge base. The journey involves crossing the Kahiltna Glacier, gaining elevation slowly, but steadily. As you progress, the terrain begins to steepen, and the first technical sections come into play. Crevasse navigation and careful rope management are key as you approach the 10,000-foot mark. Camp 2 is situated on a flat area in a protected spot, offering excellent views of the surrounding landscape. Here, climbers rest and review the route ahead. The altitude gain is enough to cause noticeable strain, making it a crucial stop for acclimatization.
— — —
Day 4 – Rest and Acclimatization at Camp 2
A rest day at Camp 2 allows the body to adjust to the altitude. With the Cassin Ridge climb’s high elevation and technical difficulty in mind, this day focuses on preparation, gear checks, and rest. Climbers will often carry out small tasks like reinforcing their shelters, checking their ice axes and crampons, and organizing the route logistics. It’s essential to stay hydrated and nourished in order to avoid altitude sickness in the coming days. The team will likely spend the rest of the day reviewing the climbing strategies for the next leg of the route.
— — —
Day 5 – Move to the Base of the Cassin Ridge (11,500 ft / 3,505 m)
The real challenge begins on Day 5 when climbers make their way to the base of the Cassin Ridge. This section is steep, requiring careful rope work as you start to ascend the ridge proper. There are sections of mixed rock and ice that require technical climbing skills. It’s important to move efficiently, as these parts of the climb can be time-consuming and mentally taxing. The ridge itself offers incredible views, and as you near 11,500 feet, you’ll establish a small camp in an area that provides some protection from the elements.
— — —
Day 6 – Begin Climbing Cassin Ridge (12,800 ft / 3,902 m)
On this day, climbers begin the technical ascent of the Cassin Ridge itself. The route is known for its steep rock and ice sections, including the famous “Cassin Icefall” and exposed ridgelines. Fixed ropes and careful foot placements are necessary as the elevation gain increases. Climbers should be prepared for rock climbing mixed with ice and snow traverses. By the end of the day, climbers should aim to reach around 12,800 feet. This is a challenging and rewarding day, as it marks the beginning of the real technical climbing on Denali’s upper slopes.
— — —
Day 7 – Move to High Camp (14,200 ft / 4,328 m)
The ascent to High Camp requires climbers to cross several technical sections of the Cassin Ridge. The mixed climbing continues, and the route involves sections of vertical rock faces, snowfields, and ice walls. The climb to High Camp involves steep snow slopes and exposed ridgelines. By the time you reach High Camp at 14,200 feet, you’ll be physically tired but also excited to be closer to the summit. The camp itself offers a base for the final push and is typically placed near a rocky outcrop for protection from high winds. Expect a full day of effort with a lot of rope work.
— — —
Day 8 – Rest and Acclimatization at High Camp
A crucial rest day at High Camp is necessary to prepare for the summit push. Climbers will spend this day hydrating, eating, and resting in preparation for the difficult final leg of the climb. At this altitude, the body is working harder to acclimatize, and the air grows thinner. Climbers should check all equipment, particularly crampons, ice axes, and ropes, and make sure they are ready for the summit bid. This day is important for both physical and mental recovery before facing the final summit attempt.
— — —
Day 9 – Move to the Summit (20,310 ft / 6,190 m)
The summit push begins early in the morning. Climbers tackle the most challenging sections of the Cassin Ridge, which includes steep rock, ice, and mixed terrain. The final approach to the summit involves exposed ridgelines and technical ice climbs. The altitude and physical exertion take their toll, and climbers will be required to use all of their technical climbing skills to safely ascend the final stretch. The summit of Denali offers breathtaking views and a sense of accomplishment, but the climb is grueling, taking anywhere from 10–12 hours to reach the top.
— — —
Day 10 – Extra Summit Day (Weather Buffer)
Given Denali’s unpredictable weather, this day serves as a buffer in case summit conditions on Day 9 weren’t favorable. If the weather prevented a summit attempt on Day 9, the team will attempt to summit today. If a summit is already completed, this day allows climbers to rest and recover. The weather at Denali is volatile, and teams may have to wait for a perfect window to complete the summit. Climbers use this day to stay prepared and keep an eye on weather updates.
— — —
Day 11 – Descend to High Camp (14,200 ft / 4,328 m)
After the summit, climbers descend back to High Camp. Descending the Cassin Ridge requires caution as the technical terrain can be tricky, and the altitude can still be taxing on the body. Returning to High Camp marks a huge step in the expedition as the climb down is typically quicker, but no less challenging. Climbers will be careful about crevasses, avalanches, and rockfall during the descent. After reaching High Camp, the team will take a well-earned rest.
— — —
Day 12 – Descend to Camp 2 (10,000 ft / 3,048 m)
The descent from High Camp to Camp 2 is often a long and demanding day. The descent involves retracing the technical sections of the Cassin Ridge, though it’s typically faster going down. The terrain can still be tricky, and climbers need to maintain focus. Once at Camp 2, you’ll be relieved to have crossed the hardest part of the climb and can now focus on completing the descent back to Base Camp. Expect a 7–9 hour day.
— — —
Day 13 – Descend to Camp 1 (7,800 ft / 2,377 m)
The descent to Camp 1 is less steep and demanding, but it’s still necessary to maintain vigilance as you navigate crevasses and rocky sections. It’s an opportunity to reflect on the summit success and anticipate the return to Base Camp. The day’s effort usually takes around 5–7 hours. Once back at Camp 1, climbers can rest and prepare for the final descent to Base Camp.
— — —
Day 14 – Descend to Base Camp (7,200 ft / 2,195 m)
The final descent takes you all the way back to Base Camp, where it’s a relief to reach after such a long climb. The descent along the Kahiltna Glacier requires careful navigation, but the technical work is behind you. The team will return to Base Camp exhausted but elated, having completed one of the most challenging climbs in the world.
— — —
Day 15–21 – Weather Buffer / Flight Out
Depending on the weather, climbers may experience delays at Base Camp waiting for their return flight to Talkeetna. Weather in the Alaska Range can be unpredictable, and some climbers might need to wait for multiple days for a safe flight. These days are typically spent resting, reflecting on the climb, and preparing to head home.
— — —

Mount Denali Need to Know, Top Tips & Best Photo Spots
Climbing Mount Denali is one of the most challenging feats in the world of mountaineering. With an elevation of 20,310 feet (6,190 meters), it’s the highest peak in North America, and the climb requires careful planning, solid technical skills, and a high level of physical fitness. The weather conditions are extreme, and the altitude can have a significant impact on your body’s performance. Preparation is key, whether you’re climbing independently or as part of a guided expedition. Here’s a comprehensive guide to help you prepare for this incredible adventure.
Essential Gear List for Climbing Mount Denali
Clothing and Layering
- Down Jacket – Critical for staying warm in extreme cold, especially above 12,000 feet. A high-quality, insulated down jacket is essential for summit days.
- Waterproof Outer Shell – Windproof and waterproof jacket and pants to protect against Denali’s fierce winds and snowstorms.
- Mid-Layers – Fleece or synthetic insulation to help you regulate your temperature as conditions change.
- Base Layers – Moisture-wicking, thermal base layers to manage sweat and keep you dry. Layering is essential at high altitudes.
- Mountaineering Boots – Double or triple insulated boots designed for high-altitude climbing. These boots keep your feet warm, dry, and protected.
- Gaiters – Essential for keeping snow and debris out of your boots, especially in deep snow.
- Warm Hat and Balaclava – A good, insulated hat for your head and balaclava for face protection against windburn and frostbite.
- UV Sunglasses and Glacier Goggles – Protect your eyes from intense UV radiation and the harsh glare from the snow and ice.
- Waterproof Gloves and Mittens – Thick, insulated gloves are necessary for summit day, with mittens to wear over them during rest stops to keep your hands warm.
Camping and Sleeping
- Four-season Tent – A robust, storm-resistant tent is necessary to withstand the high winds and severe weather conditions.
- High-Altitude Sleeping Bag – Rated to at least ‑20°F (-29°C) to keep you warm during freezing nights at high altitudes.
- Sleeping Pad – An inflatable plus foam pad for comfort and insulation on the snow.
- Stove and Fuel – A cold-weather stove like the MSR Whisperlite is essential for melting snow and cooking meals.
- Cooking Gear – Compact and lightweight pots, mugs, and utensils to keep your camp cooking efficient and warm.
Technical and Climbing Gear
- Trekking Poles – Essential for stability on uneven and snowy terrain and to reduce fatigue.
- Ice Axe – An essential tool for balance and security, particularly on steep sections of the climb.
- Crampons – Necessary for secure footing on ice and snow, especially near the summit.
- Climbing Helmet – Although optional, it’s a smart choice for glacier travel or when moving under ice and snow.
Miscellaneous Essentials
- Water Bottles and Insulated Containers – Wide-mouth bottles to prevent freezing, and insulated containers to keep liquids warm.
- Headlamp – A strong, rechargeable headlamp with extra batteries is necessary for early starts and summit pushes.
- Sunscreen and Lip Balm – High SPF sunscreen to protect from the intense UV exposure, and lip balm with SPF to prevent chapping.
- First Aid Kit – Including blister treatment, altitude medications (like Diamox), pain relievers, and a basic first aid kit.
- Dry Bags or Waterproof Stuff Sacks – Protect clothing and sleeping gear from snow and moisture.
- Multitool or Knife – Handy for repairs, food prep, and other camp tasks.
Elevation Profile Overview
Mount Denali’s elevation of 20,310 feet (6,190 meters) requires climbers to carefully manage their time at high altitudes. The three main routes (West Buttress, West Rib, and Cassin Ridge) all involve gradual gains in altitude over a period of 2–4 weeks. Climbers typically start at Base Camp at around 7,200 feet, moving through various camps as they acclimatize and ascend.
- Base Camp sits at approximately 7,200 feet.
- High Camps range from 14,000 feet to 17,200 feet, depending on your route.
- Summit Day involves a steep and strenuous climb of over 3,000 feet in one go, with extremely thin air and freezing temperatures.
Expect slow progress above 14,000 feet, as oxygen levels drop to half of what they are at sea level, making every step more difficult. Climbers must take rest days for acclimatization to prevent altitude sickness and ensure summit success.
Permit Information
Climbing Mount Denali requires a permit, which is issued by the Denali National Park & Preserve. The permit process is straightforward but must be completed in advance, and it involves the following:
- Seasonal Permits: Prices vary by the season—late spring and early summer are the busiest.
- Guided vs. Independent: Climbers can either go independently (if they meet experience requirements) or hire a guide.
- Group Size Limit: There are restrictions on group sizes—individuals or small teams are encouraged for safety reasons.
The application for the permit is made through the Denali National Park office in Talkeetna, and it’s recommended to apply early as permits are limited. Make sure to also have:
- Proof of medical insurance.
- Proof of your climbing experience (if applying independently).
- Emergency evacuation insurance.
Top Tips for a Successful Denali Climb
- Train for endurance. Denali is a long, grueling climb that requires stamina more than anything. Physical fitness, mental toughness, and preparing your body for prolonged exertion are key.
- Don’t rush acclimatization. The “climb high, sleep low” rule is crucial—take your time to acclimatize at each camp. Rushing can lead to altitude sickness or failure to summit.
- Expect extreme weather. Denali is known for its volatile weather, with sudden snowstorms, high winds, and frigid temperatures. Always be prepared for anything.
- Hydrate and eat constantly. At high altitudes, it’s easy to lose appetite, but it’s essential to keep your energy up with high-calorie food and plenty of fluids.
- Keep your gear organized. Keep everything secure and organized in your pack, as the weather can change quickly. Avoid leaving gear exposed to snow or ice.
- Prepare for delays. Weather can delay flights in and out of the mountain or even slow your climb. Build in some extra time for flexibility.
Best Photo Spots
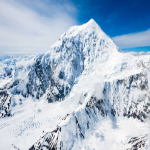
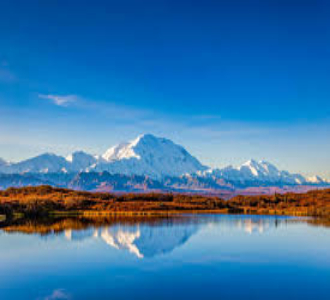
The ultimate shot: From the summit of Denali, capturing the breathtaking view of the surrounding Alaskan Range, with endless glaciers and towering peaks stretching across the horizon. If you’re fortunate enough to have clear skies, you can see the Alaska Range in all its glory. On the climb, one of the best photo spots is from Camp 4 (17,200 feet), looking back at the vastness of the Kahiltna Glacier below. Sunrise or sunset photos from this elevation are stunning, with the golden light casting shadows over the rugged terrain.
For drama, shots from Camp 3 (14,000 feet) as the sun dips behind the ridge are incredibly picturesque, and this area offers unique perspectives of Denali’s intimidating silhouette. The Cassin Ridge also offers impressive photography moments, particularly on the technical climbing sections when the light is right.