Mount Elbrus Trekking Guide:
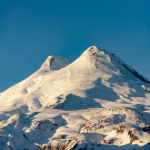
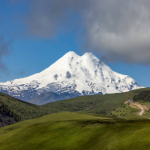
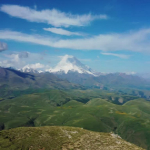
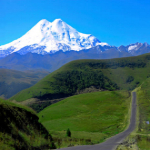
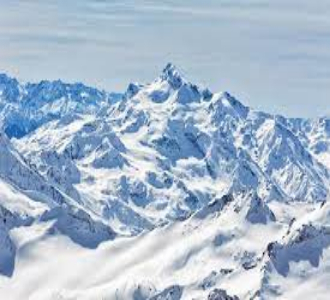
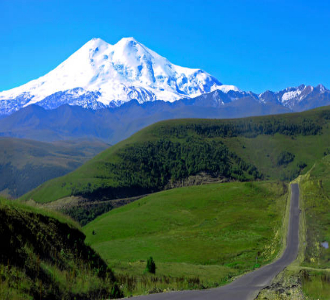
Overview: Standing proudly at 18,510 feet (5,642 meters), Mount Elbrus is the highest peak in Europe and one of the Seven Summits, making it a prime destination for ambitious climbers seeking to conquer the tallest mountains on each continent. Located in the rugged Caucasus Mountains of Russia, Elbrus is a dormant volcano with twin summits, often shrouded in snow and clouds, creating a dramatic and awe-inspiring landscape.
While Elbrus’s height and prominence are undeniable, it is considered one of the more accessible of the Seven Summits due to its non-technical routes, especially the popular South Route. However, despite the relatively straightforward climb, Mount Elbrus demands physical endurance, altitude acclimatization, and a readiness to face rapidly changing weather conditions. Climbers must be prepared for bitter cold, strong winds, and the challenges of traveling through snow and ice at high altitudes.
The trek up Mount Elbrus is often a combination of adventure and extreme conditions. Unlike peaks with well-established infrastructure, Elbrus’s climb requires solid preparation, self-sufficiency, and adaptability. There are three main routes to the summit:
South Route (Standard Route): The most popular and non-technical route, with established infrastructure like cable cars and huts to assist climbers. This is the route chosen by most climbers aiming for the summit.
North Route: A more remote and technical approach, requiring advanced mountaineering skills and offering a quieter, more rugged experience for those looking for a greater challenge.
West Route: A lesser-used path that combines elements of the South and North Routes but requires additional technical climbing and is often considered a more challenging ascent.
So, whether you are looking to take the well-trodden South Route to the summit or are seeking the more remote and technical challenges of the North or West Routes, our comprehensive trekking guides for Mount Elbrus are designed to help you prepare, adapt, and succeed in reaching this iconic peak, beginning with the most popular South Route:
Route 1: South Route (Standard Route) Trekking Guide:
The South Route to the summit of Mount Elbrus is the most popular path and is often considered the easiest way to reach the highest point in Europe. It’s a non-technical climb that attracts climbers of various abilities, offering a relatively straightforward approach for those seeking to check off one of the Seven Summits. However, despite its non-technical nature, it still presents a serious challenge, particularly due to high altitude, weather conditions, and the physical demands of the climb.
- Duration: 7–10 days
- Distance: Approx. 22 miles round-trip
- Elevation Gain: 13,000+ ft (starting from Base Camp)
- Technical Difficulty: Easy to Moderate (Alpine Grade I–II)
- Best Season: June–September
Day-by-Day Climbing Guide
— — —
Route 2: North Route Trekking Guide:
The North Route to the summit of Mount Elbrus is a more challenging and adventurous approach compared to the South Route. This route is less traveled and offers climbers the chance to experience a more remote and rugged side of Elbrus. The North Route requires more technical skills, including glacier navigation, crevasse awareness, and dealing with potentially more severe weather conditions. It’s an ideal route for those seeking a more wilderness-oriented ascent and a break from the more heavily trafficked South Route.
- Duration: 9–12 days
- Elevation Gain: Approx. 25 miles round-trip
- Technical Difficulty: Moderate to High (Alpine Grade II–III)
- Best Season: June–September
Day-by-Day Climbing Guide
— — —
Route 3: West Route Trekking Guide:
The West Route to the summit of Mount Elbrus is one of the more adventurous paths to the top, providing a less-traveled but equally thrilling approach. This route offers a combination of glacier crossings, steep ascents, and technical challenges, all while providing an unmatched wilderness experience. It is less frequented compared to the South and North Routes, making it ideal for those seeking solitude and a more rugged, isolated climb. The West Route is considered one of the most challenging of the standard Elbrus climbs, requiring a solid foundation in mountaineering techniques, high-altitude acclimatization, and self-sufficiency.
- Duration: 10–14 days (including approach)
- Technical Difficulty: Moderate to High (Alpine Grade III)
- Best Season: June–September
Day-by-Day Climbing Guide
Day 1 – Arrive at West Base Camp (2,400 meters / 7,874 ft)
Your journey begins with arrival at the West Base Camp, located on the less-frequented side of Mount Elbrus. This area is quieter compared to the South, offering a more peaceful atmosphere as you prepare for the climb. Upon arrival, you’ll undergo a thorough briefing, get your gear checked, and begin the acclimatization process. Take the time to adjust to the altitude and prepare for the ascent ahead. The rest of the day is dedicated to relaxation and the vital task of hydrating.
Day 2 – Acclimatization Hike to Priut 11 Hut (3,700 meters / 12,139 ft)
Today marks the first step towards gaining altitude. You’ll hike up to Priut 11 Hut, a prominent refuge located on the mountain at 3,700 meters. This moderate hike allows you to gain valuable altitude while also giving your body the chance to acclimatize. The route to the hut is characterized by rocky paths and loose scree, with beautiful views of the surrounding glaciers. Once at the hut, you’ll rest, hydrate, and take in the alpine surroundings before heading back to Base Camp for the night.
Day 3 – Move to the Higher Camp (4,200 meters / 13,780 ft)
After a rest day, you’ll make your way up to Higher Camp, where you’ll spend a couple of nights before making the final summit push. The hike is challenging, with steep sections that require careful footing on rocky and snowy terrain. Once you reach Higher Camp, which sits at 4,200 meters, you’ll set up camp and relax in preparation for the more strenuous days ahead. At this elevation, it’s crucial to focus on hydration and keeping energy levels up.
Day 4 – Acclimatization Day at Higher Camp
Rest and acclimatization are the main goals today. You’ll spend the day resting, eating, and hydrating while adjusting to the altitude. This is an important day, as it gives your body time to recover from the previous climbs and prepare for the final ascent. You may also do some light training or acclimatization hikes near camp to keep your body active. The weather can change quickly in the higher regions of Elbrus, so flexibility is key.
Day 5 – Move to Camp 2 (4,800 meters / 15,748 ft)
Today, you’ll begin your push towards the higher camps. From Higher Camp, you’ll ascend toward Camp 2, located at 4,800 meters. The route will be a mixture of rocky terrain and snow, with some moderate climbing sections. The climb can take around 5–6 hours, and upon reaching Camp 2, you’ll have a good view of the surrounding peaks and glaciers. The camp is basic but provides shelter and a place to rest as you prepare for the final summit attempt.
Day 6 – Rest and Acclimatization Day at Camp 2
A crucial rest day at Camp 2 will allow your body to recover and continue the acclimatization process. The terrain and altitude are beginning to take a toll on your body, and this day will help to prepare you for the summit push. You’ll focus on hydration, eating calorie-dense meals, and resting in the shelter of your tents. Some climbers use this day to practice glacier travel skills or review key summit strategies, but for most, it’s simply a chance to rest and relax.
Day 7 – Summit Push Begins (5,642 meters / 18,510 ft)
Summit day has arrived! You’ll begin your ascent early in the morning to maximize your chances of good weather. From Camp 2, you’ll ascend the West Face, crossing glaciers, crevasses, and snowfields. The terrain becomes steeper as you approach the summit ridge, with some sections requiring technical skills in ice axe and crampon use. The final push to the summit is long and physically demanding, but as you near the top, the views are breathtaking. After several hours of climbing, you’ll reach the summit at 5,642 meters, the highest point in Europe. The sense of achievement is immense, as the summit offers panoramic views of the Caucasus Mountains and beyond.
Day 8 – Descend to Camp 2
After the exhilarating achievement of summiting Elbrus, you’ll begin the descent back to Camp 2. While the descent is typically faster, the terrain is still treacherous, and you’ll need to remain focused. It’s important to stay careful on the icy sections, as the journey down can be just as demanding as the ascent. Once back at Camp 2, you’ll rest, hydrate, and reflect on your summit achievement.
Day 9 – Descend to Higher Camp
The next day, you’ll continue your descent back to Higher Camp. It’s important to maintain focus on the descent, as the lower sections of the mountain can have hidden dangers such as loose rocks or snow-covered crevasses. The pace will be quicker than the climb up, but you’ll still need to be cautious. Upon reaching Higher Camp, you’ll rest for the night and recuperate before descending to Base Camp.
Day 10 – Descend to Base Camp
You’ll complete the journey by descending to Base Camp, where you’ll be greeted by the familiar sights of the lower camps. The descent typically takes about 4–6 hours, and while physically easier, it still requires attention, especially with the snow and ice conditions. Once at Base Camp, you can reflect on your journey, enjoy a well-deserved rest, and celebrate the successful completion of the climb.
Day 11 – Reserve Weather Day / Buffer Day
Given the unpredictable nature of the weather on Elbrus, many expeditions include an extra weather day in case of summit delays. This day offers the chance to rest, reflect, and prepare for your return journey. If you’ve already summited, this day serves as a chance to relax, recover, and make sure everyone is ready for the trip back to civilization.
Day 12 – Departure from Base Camp
The final day sees your departure from Base Camp. After packing up, you’ll take a jeep back to the nearest town (often Terskol), where you can catch transportation back to the airport or other points of departure. Your adventure on Mount Elbrus has come to an end, but the memories of the challenging West Route, stunning views, and the summit itself will remain with you for years to come.
— — —

Mount Elbrus: Need to Know, Top Tips & Best Photo Spots
Climbing Mount Elbrus is a monumental challenge, but with the right preparation, it offers an unforgettable adventure. Standing at 18,510 feet (5,642 meters), it is the highest peak in Europe, and although technically less difficult than other peaks of similar altitude, Elbrus still demands solid mountaineering skills and the ability to manage the harsh mountain conditions. The climb requires a mix of endurance, technical competence in ice and snow, and an ability to cope with high-altitude environments. Weather conditions can be unpredictable, and the altitude poses a serious challenge, so planning, acclimatization, and careful attention to your physical condition are crucial.
Here’s everything you need to know to prepare for your Elbrus adventure:
Essential Gear List for Climbing Mount Elbrus
Clothing and Layering
- Down Jacket – Essential for warmth at high altitudes, especially for summit day, when temperatures can plummet well below freezing.
- Waterproof Outer Shell – Windproof and waterproof jacket and pants are critical to shield you from Elbrus’ unpredictable weather.
- Mid-Layers – Fleece or synthetic insulation is necessary to manage your body temperature throughout the ascent.
- Base Layers – Moisture-wicking, thermal base layers help keep you dry and comfortable as you ascend.
- Mountaineering Boots – High-quality, insulated boots are required to keep your feet warm and protected from the elements.
- Gaiters – Important for preventing snow from entering your boots and for added protection in deeper snow conditions.
- Warm Hat and Balaclava – A good, insulated hat for summit day and a balaclava for face protection in high winds and cold temperatures.
- UV Sunglasses and Glacier Goggles – Essential for protecting your eyes from UV rays and glare from the snow.
- Waterproof Gloves and Mittens – Insulated gloves for climbing and summit attempts, with mittens for extra warmth during rest breaks.
Camping and Sleeping
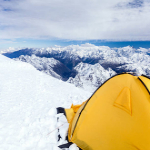
- Four-season Tent – A sturdy, storm-resistant tent is vital for enduring high winds and extreme cold at Base Camp and higher camps.
- High-Altitude Sleeping Bag – Rated for ‑20°F (-29°C) or colder, as temperatures can drop significantly overnight.
- Sleeping Pad – An inflatable pad plus foam for added insulation and comfort during your stay on the mountain.
- Stove and Fuel – A reliable cold-weather stove is necessary for melting snow for drinking water and preparing meals.
- Cooking Gear – Compact and efficient gear, including pots and utensils, is key to reducing weight and maximizing space in your pack.
Technical and Climbing Gear
- Trekking Poles – Useful for stability on uneven terrain and during glacier crossings.
- Ice Axe – Essential for balance and self-arrest, especially on icy slopes and steeper sections.
- Crampons – Required for secure footing on glaciers and snow-covered sections.
- Climbing Helmet – A helmet is essential for safety when traversing under glaciers or rocky sections.
Miscellaneous Essentials
- Water Bottles and Insulated Containers – Wide-mouth bottles to prevent freezing, and insulated containers to keep liquids warm.
- Headlamp – A strong headlamp with extra batteries for early starts or late finishes.
- Sunscreen and Lip Balm – High SPF sunscreen and lip balm to protect from UV exposure at high altitudes.
- First Aid Kit – A small first aid kit including blister treatment, pain relievers, and altitude medications (like Diamox).
- Dry Bags or Waterproof Stuff Sacks –Protect gear from moisture, particularly sleeping bags and clothing.
- Multitool or Knife – Handy for repairs, food prep, and other camp tasks.
Elevation Profile Overview
Mount Elbrus stands at 18,510 feet (5,642 meters), requiring careful acclimatization for any climber. The main ascent routes (the South Route and the West Route) are both demanding, with gradual increases in altitude as you ascend. Climbers will typically start at Base Camp at around 2,400 meters, with high camps situated between 3,700 meters and 4,800 meters.
- Base Camp sits at approximately 2,400 meters.
- High Camps range from 3,700 meters to 4,800 meters.
- Summit Day involves a significant ascent from high camp to the summit, with a final push of around 1,000 meters to reach the top.
Above 4,000 meters, the oxygen level drops to about 60% of sea-level pressure, which can cause rapid fatigue and elevation sickness without proper acclimatization. Climbers need to pace themselves, hydrate frequently, and ensure they have ample rest days to maximize summit success.

Permit Information
Climbing Mount Elbrus requires a permit issued by the Russian authorities. This is typically arranged through the local tourist agency or guiding company. A few essential details to know:
- Permit Process: Prices vary by the season—late spring and early summer are the busiest.
- - Fees: Permit fees vary depending on the route and season, typically higher in the summer.
- Guided vs. Independent: While many climbers opt for a guided expedition, it’s possible to climb independently if you meet the experience and equipment requirements.
- Group Size Limit: The Russian authorities typically regulate group sizes, and guides must adhere to these limits for safety reasons.
Ensure that you have adequate travel insurance, including evacuation coverage, and always check the latest requirements from official sources or your guiding company.
Top Tips for a Successful Elbrus Climb
- Acclimatization is Key – Elbrus’ altitude can cause serious altitude sickness if you don’t take it slow. Always take a few extra days to acclimatize at each camp to give your body the best chance of success.
- Pack Smart – Keep your load as light as possible while still carrying everything necessary for the climb. A smart packing strategy is essential to avoid carrying unnecessary weight.
- Stay Hydrated – With the dry, cold conditions, dehydration is a common problem at altitude. Drink plenty of fluids and eat calorie-dense foods to maintain your strength.
- Be Prepared for Weather Changes – Elbrus’ weather can change suddenly. Always be ready for snowstorms, strong winds, and extreme cold, even during summer.
- Train for Endurance – The climb will test your stamina, so regular endurance training leading up to the trip is crucial. Include cardio, strength, and altitude training in your preparation.
- Have a Contingency Plan – The summit push can often be delayed due to weather or other conditions. Always have a flexible schedule and be ready to adapt to changing conditions.
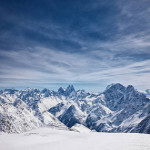
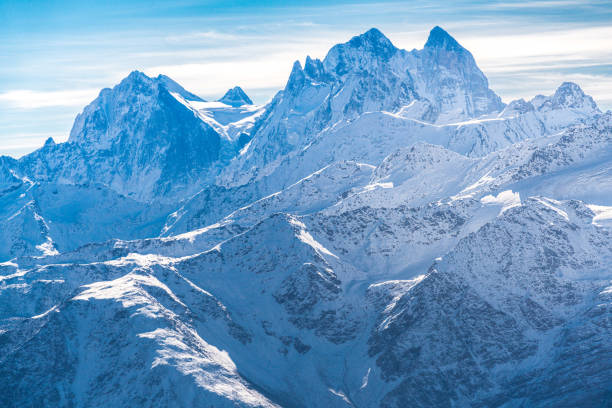
Best Photo Spot:
The summit of Mount Elbrus offers breathtaking panoramic views of the Caucasus Mountains and surrounding glaciers. On a clear day, the view is truly unforgettable, stretching across snow-capped peaks and expansive valleys. A great photo opportunity also comes from the top of the chairlift at 3,800 meters, where climbers are treated to stunning views of the mountainside as they rise above the valley. The glaciers along the West Route provide dramatic, icy landscapes perfect for capturing the raw beauty of Elbrus, while sunrise shots from high camp showcase the mountain bathed in the soft, golden light of dawn. As you ascend the final ridge to the summit, the terrain’s dramatic contours create epic moments for photographers, particularly when the first light of the day casts long shadows across the snow and ice, adding a surreal quality to the scene.