Mount Everest — The summit of the World…
The Roof of the World – Rising like a titan above the clouds, Mount Everest soars to 8,848.86 meters (29,031.7 feet), claiming its place as the highest point on Earth and the ultimate symbol of adventure. It dominates the horizon where the rugged peaks of the Himalayas meet the endless sky, a white giant standing in majestic silence. Known as Sagarmatha in Nepal and Chomolungma in Tibet, Everest is more than just a mountain—it is a living legend, revered for centuries and feared for its merciless extremes.
The mountain’s twin identities, as both a sacred guardian and an unforgiving force of nature, give Everest a mystique few places on Earth can match. Brutal winds roar across its flanks, temperatures plummet to deadly lows, and the “Death Zone” above 8,000 meters challenges the limits of human survival. Yet for those who dare, Everest offers something no other summit can: a chance to stand on the highest place on the planet, to touch the sky itself. Every feature of the climb—from the prayer-flag-draped trails of the Khumbu Valley to the seracs and ladders of the Khumbu Icefall, the exposed ridges, and the final knife-edge push to the summit—is a step into history and legend, fueled by ambition, grit, and the eternal pull of the unknown.
The History of Mount Everest
Mount Everest has long been sacred to the local Sherpa and Tibetan communities, but it wasn’t until the 19th century that it began to capture the imagination of the outside world. Named after British surveyor Sir George Everest, the mountain first entered Western maps during the Great Trigonometric Survey of India in the 1850s. Early expeditions, starting in the 1920s, were legendary in their ambition and hardship. Explorers like George Mallory and Andrew “Sandy” Irvine famously disappeared near the summit in 1924, sparking decades of mystery—did they reach the top before their deaths?
It wasn’t until May 29, 1953, that Sir Edmund Hillary of New Zealand and Tenzing Norgay, a Sherpa from Nepal, successfully made the first confirmed ascent of Everest via the South Col route. Their achievement echoed around the world, forever entwining their names with mountaineering history. In the decades since, thousands of climbers have attempted the summit, battling fierce storms, avalanches, and extreme altitude. Modern expeditions benefit from better gear, satellite forecasts, and organized support teams, but Everest remains an unforgiving mountain that demands respect and preparation. Despite the commercial growth of climbing on Everest, the spirit of exploration and awe continues to define every step toward its storied summit.
How to Get to Mount Everest
Most climbers aiming to summit Mount Everest take the South Col Route from Nepal, starting in the bustling capital city of Kathmandu. After securing permits and finalizing logistics with an expedition company, climbers typically fly from Kathmandu to Lukla Airport, famous for its short, cliff-edge runway perched high in the Himalayas. From Lukla, the journey continues on foot, trekking for about 8–12 days through the scenic Khumbu Valley, passing through Sherpa villages like Namche Bazaar, Tengboche, and Dingboche, before reaching Everest Base Camp at 5,364 meters (17,598 feet).
The trek itself is an essential part of acclimatization, helping climbers gradually adjust to the thinning air. Along the way, the route is lined with fluttering prayer flags, ancient monasteries, and soaring views of iconic peaks like Ama Dablam and Lhotse. Upon reaching Base Camp, climbers spend several weeks acclimatizing and preparing for the higher climbs, including rotations up to camps at 6,400 meters (Camp 1), 7,200 meters (Camp 2), 7,800 meters (Camp 3), and finally to the South Col (Camp 4) before launching a summit bid.
Alternatively, climbers taking the North Ridge Route approach Everest from Tibet, traveling overland from Lhasa to Everest Base Camp (North). This route involves more direct vehicle access to Base Camp, but stricter regulations, colder temperatures, and technical climbing on the upper mountain.
Whichever side you choose, reaching the “Top of the World” is a monumental undertaking that starts long before you set foot on the mountain—requiring months, sometimes years, of preparation and a determined spirit willing to chase dreams into the sky.
Mount Everest Facts & Figures:
- Location: Nepal (Khumbu region) and Tibet (Xizang Autonomous Region), Asia
- Mountain Range: Himalayas
- Altitude: 8,848.86 meters / 29,031.7 feet above sea level
- First Ascent: May 29, 1953, by Sir Edmund Hillary (New Zealand) and Tenzing Norgay (Nepal)
- Main Climbing Season: Late April to early June (pre-monsoon spring season offers the most stable weather conditions; smaller window in autumn)
- Common Routes: South Col Route (Nepal side, most popular), North Ridge Route (Tibet side, more technical and remote)
- Summit Duration: Typically 6–8 weeks from arrival at Base Camp to summit and back, including acclimatization rotations and waiting for a summit window
- Permit Cost: Roughly $11,000 USD for a Nepal climbing permit; Tibet permits are part of a package organized by Chinese mountaineering authorities
- Guided Expedition Cost: Average of $40,000 to $70,000 USD; budget options around $30,000 exist, while high-end full-service expeditions can exceed $100,000 USD
- Weather Conditions: Everest’s weather is extreme and highly volatile. Summit temperatures can plunge below ‑30°C (-22°F) with deadly wind chills, especially on the exposed ridges. High-altitude storms, jet stream winds exceeding 100 mph (160 km/h), and sudden snowfall can trap climbers for days. Clear summit windows are brief and rare.
- Base Camps:
- South Base Camp (Nepal): 5,364 meters / 17,598 feet
- North Base Camp (Tibet): 5,150 meters / 16,900 feet
- Acclimatization Needed: Absolutely critical — multiple acclimatization rotations to higher camps are required before any summit attempt to prevent serious altitude illnesses like HAPE or HACE.
- Fitness Level Required: Very High — climbers must possess exceptional endurance, aerobic conditioning, and mental resilience. Pre-expedition training typically includes mountaineering experience at 6,000–7,000 meters.
- Technical Difficulty:
- South Col Route: Considered moderately technical; involves glacier travel, ladders over crevasses, icefalls, and steep rock sections near the summit.
- North Ridge Route: More technical; requires fixed-line climbing across the notorious “Second Step,” exposed traverses, and steeper snow and rock faces.
- Permit Required: Yes — and climbers must secure either a Nepalese government permit (individual or group) or a Chinese-issued permit (through a registered expedition company).
- Emergency Services: Helicopter evacuation is possible from Nepal Base Camp and lower camps (Camp 1 in some cases), but extremely limited above 6,000 meters. On the Tibet side, helicopter rescues are not permitted — self-rescue or ground evacuations only.
- Wildlife: Everest’s lower valleys, like the Khumbu, are home to snow leopards, Himalayan tahrs, musk deer, and colorful pheasants like the Danphe. However, above 5,000 meters, the environment is too harsh for most wildlife. Occasional sightings of birds like the Himalayan snowcock or chough are possible even at high altitudes.
Mount Everest Trekking Guide:
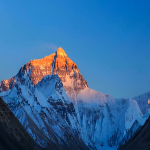
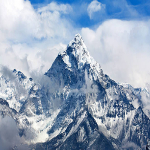
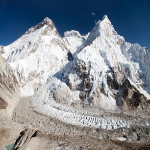
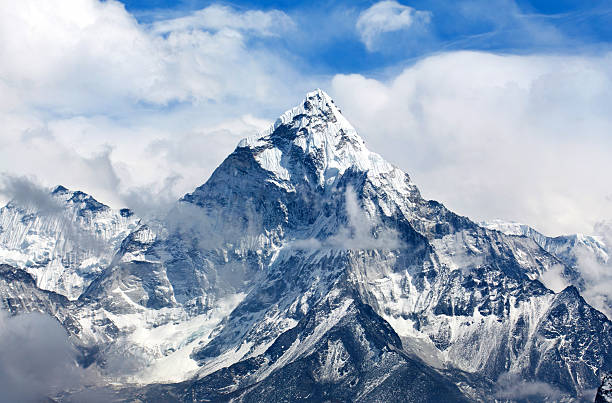
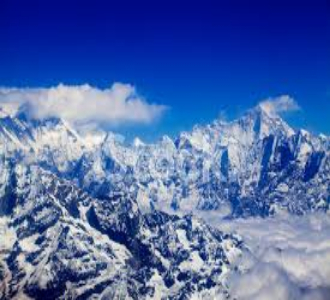
Overview: Standing as the tallest mountain on Earth at 29,031.7 feet (8,848.86 meters), Mount Everest is the ultimate prize for mountaineers and adventurers worldwide. Straddling the border between Nepal and Tibet, Everest’s legendary stature as the “Roof of the World” makes it a dream destination for climbers seeking to test their limits against nature’s highest frontier. Surrounded by the towering peaks of the Himalayas and the vast glaciers of the Khumbu region, Everest offers a landscape of staggering beauty, extreme conditions, and deep cultural richness.
Despite its fame, summiting Mount Everest remains an incredibly demanding endeavor. The trek to Base Camp alone is a major challenge, and the actual climb requires intense physical conditioning, meticulous acclimatization, and readiness to confront severe altitude sickness, unpredictable weather, and technical obstacles. Everest may have well-trodden paths and a long history of expeditions, but the mountain’s risks are ever-present, and success demands both respect and preparation.
There are two main routes to the summit of Mount Everest:
South Col Route (Nepal Side): By far the most popular and traditional route, first pioneered by Hillary and Tenzing. It offers more accessible logistics, well-established camps, and helicopter support up to Base Camp, but still requires navigating the dangerous Khumbu Icefall, steep Lhotse Face, and exposed summit ridge.
North Ridge Route (Tibet Side): A more remote, technical, and often colder alternative. Climbers must negotiate long traverses at extreme altitude, including the infamous Second Step, a vertical rock face that requires technical climbing skills and has historically been a major barrier to success.
While the South Col Route attracts the majority of climbers due to its relative accessibility and better rescue options, the North Ridge provides a quieter, less crowded experience for those with advanced skills and the desire to tackle Everest from a more remote angle. So, whether you aim to join the storied footsteps along the South Col or seek the harsher, less traveled paths of the North Ridge, our detailed trekking and climbing guides for Mount Everest will help you prepare physically, mentally, and logistically for one of the most challenging and awe-inspiring adventures on the planet—starting with the approach trek to Everest Base Camp:
Route 1: South Col Route (Nepal Side) Trekking Guide:
The South Col Route on Mount Everest is the most famous and most frequently climbed path to the summit of the world’s highest mountain. First pioneered by Sir Edmund Hillary and Tenzing Norgay in 1953, this route remains the standard for most expeditions attempting Everest. While extensive infrastructure, experienced guides, and Sherpa support make the South Col Route accessible to determined climbers, it remains a formidable challenge requiring excellent physical fitness, careful acclimatization, and immense mental resilience. The extreme altitude, technical sections like the Khumbu Icefall, Lhotse Face, and the Summit Ridge, and the unpredictable Himalayan weather make Everest a climb that demands the utmost respect:
- Duration: 6–9 weeks total (including trekking to Base Camp, acclimatization rotations, and summit window)
- Distance: Approx. 80 miles (130 kilometers) round-trip (trek to Base Camp + climb)
- Elevation Gain: 17,700+ ft (starting from Lukla at 2,860 meters / 9,383 ft to the summit)
- Technical Difficulty: Difficult (Alpine Grade II–IV)
- Best Season: Late April to early June (pre-monsoon window)
Day-by-Day Climbing Guide
Day 1 – Arrival in Kathmandu (1,400 meters / 4,593 ft)
Upon arrival in Kathmandu, Nepal’s chaotic but charming capital, you’ll be immersed immediately in the colorful life of Thamel, the expedition hub. Expect streets filled with trekkers, mountaineers, gear shops, prayer flags fluttering from rooftops, and the aroma of momos (Nepali dumplings) wafting through the air. In the afternoon, you’ll attend a comprehensive briefing with your expedition leader, covering everything from the trek to Base Camp to high-altitude climbing strategies. Gear checks are mandatory to ensure every crampon, down suit, and oxygen mask is up to standard. Final shopping for essentials like extra gloves, snacks, and toiletries happens here before leaving the comforts of the city.
Day 2 – Fly to Lukla (2,860 meters / 9,383 ft) and Trek to Phakding (2,610 meters / 8,563 ft)
Your expedition truly begins with a heart-stopping flight to Lukla — often described as one of the most exhilarating airstrips on Earth. The tiny Twin Otter planes weave between towering Himalayan giants before touching down on a short sloping runway. After collecting your duffels and meeting your Sherpa team, you’ll start trekking through scenic trails lined with rhododendrons, crossing rivers via thrilling suspension bridges. The trek to Phakding is an easy introduction, descending slightly through pine forests along the Dudh Kosi River. The night is spent in a cozy tea house, providing your first taste of mountain life.
Day 3 – Trek to Namche Bazaar (3,440 meters / 11,286 ft)
Today’s trek is more demanding, with several suspension bridges and a long, steady uphill climb into higher elevations. The highlight of the day is crossing the famous Hillary Suspension Bridge, a swaying, prayer-flag-draped crossing suspended high above a roaring gorge. After a final steep ascent, you reach Namche Bazaar, the vibrant Sherpa town shaped like an amphitheater into the mountainside. Namche has everything from bakeries to gear shops and even coffee houses. It’s a crucial acclimatization stop — and a chance to enjoy a cappuccino before the real hardships begin.
Day 4 – Acclimatization Day in Namche Bazaar
Acclimatization days are vital on Everest. Today, you’ll hike to higher altitudes to stimulate your body’s adaptation to the thinner air. A typical excursion climbs to the Everest View Hotel (3,880 meters), offering stunning views of Everest, Lhotse, Nuptse, and Ama Dablam. Some trekkers venture further to the Sherpa villages of Khunde and Khumjung, visiting the famous Khumjung monastery. After enjoying the views and a packed lunch, you descend back to Namche to sleep at a lower elevation, crucial for minimizing altitude sickness risks.
Day 5 – Trek to Tengboche (3,860 meters / 12,664 ft)
Leaving Namche, the trail contours the hillside, offering breathtaking views of Everest and its surrounding peaks. After descending to cross the Dudh Kosi again, you’ll face a steep, relentless climb through rhododendron forests to reach Tengboche Monastery. Tengboche is a serene and spiritual place — monks chant during afternoon prayers, and the mighty bulk of Ama Dablam towers above. Climbers often find this spot humbling, a moment of reflection before the increasingly harsh environment ahead.
Day 6 – Trek to Dingboche (4,410 meters / 14,468 ft)
The scenery transitions today from lush forest to sparse alpine scrub. As you ascend into the Imja Valley, you’ll be greeted by surreal landscapes of glacial moraines, icy rivers, and distant snow-capped peaks. Dingboche, a windswept hamlet at the foot of Ama Dablam, is your next stop. The air is noticeably thinner now, and even short walks feel effortful. You’ll begin to notice your body’s reaction to altitude and must stay vigilant for symptoms of AMS (Acute Mountain Sickness).
Day 7 – Acclimatization Day in Dingboche
Another acclimatization day is spent ascending Nangkartshang Peak, climbing up to around 5,000 meters. The trail is steep but rewards you with panoramic vistas of the world’s highest peaks, including Makalu and Island Peak. This hike boosts your red blood cell count and strengthens your acclimatization. After reaching the viewpoint, you descend back to Dingboche for rest and preparation.
Day 8 – Trek to Lobuche (4,940 meters / 16,207 ft)
The trail gradually climbs higher into desolate, rocky terrain. Along the way, you pass through the sobering Thukla Pass, where stone memorials honor fallen climbers from Everest’s past. The air is cold, and every breath feels heavier. The small cluster of lodges at Lobuche offers basic but welcome shelter for the night as you prepare for the final push to Base Camp.
Day 9 – Trek to Everest Base Camp (5,364 meters / 17,598 ft)
Today is a long and emotionally charged journey. Moving along the glacial moraine of the Khumbu Glacier, you navigate rocky ridges and shifting ice. After hours of trudging through surreal, lunar-like landscapes, you crest a final hill — and there it is: Everest Base Camp. A maze of colorful tents, expedition banners, and prayer flags stretches out beneath the towering face of the Khumbu Icefall. Here, you’ll meet the full expedition team, settle into your tent, and begin life at the foot of the highest mountain on Earth.
Days 10–30 – Acclimatization Rotations and Training
The next three weeks are dedicated to strategic acclimatization, critical training, and building strength and confidence for the summit attempt. Climbers complete multiple “rotations” up the mountain, gradually exposing themselves to higher altitudes:
Rotation 1: After a few days resting at Base Camp, you’ll make your first foray into the notorious Khumbu Icefall. This terrifying labyrinth of towering seracs, deep crevasses, and unstable ice blocks is constantly shifting. Using fixed ropes and aluminum ladders, you’ll climb through the icefall to Camp 1 (6,065 meters / 19,900 feet), located in the flat, heavily crevassed Western Cwm. After resting a night or two at Camp 1, you’ll continue higher to Camp 2 (6,400 meters / 21,000 feet).
Rotation 2: After descending back to Base Camp for recovery, you’ll undertake your second and more aggressive acclimatization rotation. This time, you sleep at Camp 2, then ascend the steep, icy Lhotse Face to reach Camp 3 (7,200 meters / 23,600 feet). Fixed lines are essential here as you haul yourself up near-vertical blue ice slopes. Some teams sleep a night at Camp 3, others touch it and descend, depending on weather and oxygen use strategies.
Throughout these rotations, your body continues to adjust. Blood thickens, lungs become more efficient, and you’ll learn crucial technical skills: traversing crevasses, self-arresting falls, and using supplemental oxygen systems. After finishing these rotations, climbers return to Base Camp for a full week or more of complete rest — allowing the body to heal and prepare for the final push.
Meanwhile, constant weather monitoring begins. Teams watch for the “summit window” — a few precious days of lower winds and clear skies forecasted usually between May 15–25. Flexibility is key; readiness to move when the window opens can be the difference between success and disaster.
Days 31–40 – Summit Push
When the weather window appears, climbers launch their summit bids:
Day 1: Climbers leave Base Camp early and move steadily through the Khumbu Icefall to Camp 1, pushing through shifting towers of ice and crevasses by headlamp.
Day 2: From Camp 1, climbers traverse the flat but crevasse-riddled Western Cwm to reach Camp 2. It’s oppressively hot during the day, and temperatures can swing wildly.
Day 3: A steep ascent up the Lhotse Face brings you back to Camp 3, now carrying supplemental oxygen. From here, the air is brutally thin.
Day 4: Climbers clip into fixed lines and climb across rock bands and steep ice to reach Camp 4 at the South Col (7,950 meters / 26,085 feet). This is a bleak, wind-swept saddle between Everest and Lhotse, often called the “Death Zone” because humans cannot survive long at this altitude.
Summit Night: After resting a few hours at the South Col, climbers don oxygen masks, down suits, and headlamps. Around 8–10 PM, they begin the grueling summit push. You’ll pass landmarks like The Balcony (a wide resting platform at 8,400 meters), then continue along an exposed ridge to the South Summit (8,749 meters). The final hurdle is the Hillary Step — once a sheer rock wall, now more of a rocky slope following the 2015 earthquake. From there, the knife-edge summit ridge leads to the world’s highest point: 8,848.86 meters / 29,031 feet.
Reaching Everest’s summit is overwhelming: brilliant sunrise over the Tibetan Plateau, the curvature of Earth visible on the horizon, and a profound sense of achievement. But the danger isn’t over. Most accidents occur on the descent, so climbers move quickly back down to South Col and lower camps, exhausted but triumphant.
Day 41 – Descend from South Col to Camp 2
After reaching the summit and surviving the brutal conditions of the Death Zone, the descent becomes a race against time, exhaustion, and weather. You’ll start early, packing your oxygen bottles, repacking gear, and preparing for a long and difficult day.
Leaving the bleak expanse of the South Col, you carefully downclimb the steep snow and ice slopes leading back to Camp 3 on the Lhotse Face. Even with the assistance of fixed lines, every step demands complete focus; mistakes are easy when bodies are drained and cognitive function is impaired by altitude and fatigue. Upon reaching Camp 3, many climbers switch off their supplemental oxygen for the remainder of the descent, though some choose to continue using it to conserve strength.
After a short break, the descent continues rapidly down the Lhotse Face. Moving lower brings some relief, as each meter of descent restores strength. The day usually ends back at Camp 2, a relatively “safe” location out of the worst dangers of the Death Zone. Upon arrival, exhausted but relieved, you finally allow yourself to rest deeply without the constant threat of altitude-related collapse hanging over you. Most climbers sleep heavily here, experiencing vivid dreams and overwhelming hunger as their bodies begin the recovery process.
Day 42 – Descend from Camp 2 to Base Camp
After a hearty breakfast at Camp 2 — usually instant noodles, rice, or soup — you’ll pack up the last of your gear for the descent back through the Khumbu Icefall. By now, the once-terrifying ladders, seracs, and rope crossings seem almost familiar, though complacency remains your biggest enemy.
Temperatures in the Icefall rise significantly during the day, increasing the danger of collapsing seracs and avalanches. For that reason, climbers depart early, often before sunrise, to minimize risk. Moving methodically through the crevasses and ice towers, you eventually hear the familiar noise of Base Camp operations — generators humming, radios crackling, cooks bustling — signaling that you’re close.
Returning to Base Camp is emotional: Sherpas and team members cheer your arrival, and there’s often an impromptu celebration of hugs, high-fives, and tears. Many climbers are moved to tears by the simple luxury of clean tents, warm meals, and oxygen-rich air at a mere 5,364 meters. You have survived Everest.
Day 43 – Rest Day at Base Camp / Packing Gear
This day is all about rest, recovery, and logistics. Your body will crave calories, and the Base Camp chefs often prepare celebration meals — yak steak, fresh vegetables, endless cups of coffee and tea, and even cakes baked at altitude to mark your success.
Emotionally, it’s a day of reflection: gratitude for the Sherpas’ tireless work, mourning for those who did not return, and a growing excitement for reuniting with family and friends. Packing also begins: sorting climbing gear, ensuring rented oxygen equipment is returned, and preparing duffels for the trek out. Expedition leaders organize loads and schedule departure times.
For many, it’s the first time they can relax in weeks, soaking up the surreal beauty of the Khumbu Glacier, the towering ice seracs, and the surrounding peaks without the pressure of survival hanging over them.
Day 44 – Trek from Base Camp to Pheriche (4,371 meters / 14,340 ft)
Having accomplished what few have, you begin the long trek back to civilization. Leaving the colorful maze of Base Camp behind, you retrace your steps down the moraine of the Khumbu Glacier.
The descent to Pheriche is physically easier — your lungs feel like they’ve been turbocharged at these “lower” altitudes — but mentally, your body is still worn down. It’s critical to walk slowly, avoid injuries, and stay well-hydrated. Along the way, you’ll encounter trekkers on their way up to Base Camp, often exchanging knowing smiles or offering congratulations.
Pheriche feels almost like a luxurious resort after the hardships of the higher mountain. Simple stone lodges, wide valleys, and abundant oxygen create a stark contrast. You sleep well, deeply, and warmly for the first time in over a month.
Day 45 – Trek from Pheriche to Namche Bazaar
Today’s trek covers a lot of ground, dropping thousands of feet in elevation. You’ll pass through Pangboche and Tengboche again, stopping briefly at the monastery if timing allows. Descending through alpine meadows and forests bursting into spring bloom, the trail feels more vivid and colorful than you remember.
Your body feels stronger by the hour. Oxygen levels rise dramatically as you drop below 4,000 meters, rejuvenating muscle and brain function. Namche Bazaar, once an exciting but exhausting climb during the trek in, now feels like a well-earned luxury.
Upon arrival in Namche, most climbers head straight for real coffee shops, bakeries, and even WiFi to connect with loved ones. Some buy small gifts: prayer flags, yak wool scarves, or “Everest Summiter” t‑shirts. A final dinner with your Sherpa team in Namche — often filled with laughter and shared memories — caps the evening.
Day 46 – Trek from Namche to Lukla; Fly to Kathmandu (Weather Permitting)
The final leg is an emotional march: down the endless stone staircases, across swaying suspension bridges, through thick forests, and back into the lower, greener valleys of the Khumbu.
You arrive in Lukla, where the familiar buzz of small aircraft fills the air. Booking a celebratory drink at a lodge and sharing laughs with other trekkers and climbers becomes tradition. Depending on weather conditions, you might catch a flight back to Kathmandu the same afternoon or the following morning.
The flight itself is thrilling — one last swoop through the Himalayan giants before descending into the warm chaos of the Kathmandu Valley. Upon landing, climbers are often overwhelmed by the sensory overload of city life: traffic noise, spicy food, and warm showers. The journey is over.
Back at your hotel, you’ll hand over rented gear, reunite with friends, and perhaps even plan a final farewell dinner with your expedition team. The sense of accomplishment — and relief — is profound.
Closing Reflection
Climbing Everest is never just a physical challenge — it is a mental, emotional, and spiritual journey unlike anything else. Whether you stood on the summit or not, the hardships endured, friendships formed, and lessons learned in the shadow of the highest mountain on Earth will stay with you forever.
— — —
Route 2: North Col Route (Tibet Side) Trekking Guide:
The North Col Route on Mount Everest is the historic and revered path first attempted by early mountaineering pioneers like George Mallory and Andrew Irvine during the 1920s. Rising from the Tibetan Plateau, this route approaches the summit from the north side of Everest, offering a remote, windswept, and technically challenging alternative to the more popular southern route. While fewer climbers tackle Everest via the North Col and Northeast Ridge, those who do are rewarded with unmatched views of Everest’s daunting North Face, less crowded slopes, and a deep connection to the mountain’s earliest expeditions.
Despite relatively easier access to base camp by road, the North Col Route is known for its extreme cold, fierce winds, complex rock steps (including the infamous Second Step), and exposed, high-altitude ridge climbing. Success on this side demands outstanding physical conditioning, high-altitude experience, technical competence on mixed terrain, and the ability to endure Everest’s harshest conditions.
- Duration: 6–9 weeks total (including travel to Base Camp, acclimatization rotations, and summit window)
- Distance: Approx. 40 miles (65 kilometers) round-trip (from Chinese Base Camp through ABC to summit)
- Elevation Gain: 11,000+ ft (starting from Chinese Base Camp at 5,200 meters / 17,060 ft to the summit)
- Technical Difficulty: Difficult (Alpine Grade II–IV)
- Best Season: Late April to early June (pre-monsoon window)
Day-by-Day Climbing Guide
Day 1: Arrival in Lhasa (3,650 meters / 11,975 feet)
Your journey begins with your arrival in Lhasa, the capital of Tibet, after flying into the city from Kathmandu or other major cities. Lhasa, located at 3,650 meters (11,975 feet), serves as the starting point for acclimatization before heading toward Everest Base Camp. The day is spent exploring the city and its famed landmarks such as the Potala Palace and Jokhang Temple. While Lhasa offers a chance to take in Tibetan culture, the primary focus will be on adjusting to the altitude. You’ll have time to rest, drink plenty of fluids, and ensure that your gear is ready for the climb ahead. Altitude sickness can affect anyone, so it’s essential to stay hydrated and take it easy.
Day 2: Drive from Lhasa to Shigatse (3,900 meters / 12,795 feet)
After a restful day in Lhasa, you’ll drive from Lhasa to Shigatse, Tibet’s second-largest city, located at 3,900 meters (12,795 feet). The 6–8 hour drive takes you through spectacular landscapes, passing by Tibetan monasteries, yak herders, and rugged mountain terrain. While the drive offers breathtaking views of the Tibetan Plateau, it also provides an opportunity to begin acclimatizing to the higher altitudes. The drive is relatively smooth, but keep in mind that altitude effects can begin to become noticeable, so take time to stop, rest, and hydrate along the way. Upon reaching Shigatse, you’ll spend the night in a hotel, where you’ll continue to adjust to the altitude before making the final journey to Everest Base Camp.
Day 3: Drive from Shigatse to Rongbuk (5,000 meters / 16,404 feet)
This is one of the most significant days of the trek, as you will drive from Shigatse to the Rongbuk Monastery, which is located at 5,000 meters (16,404 feet), the highest monastery in the world. The drive is approximately 6 hours, passing through arid landscapes, yak herders, and remote villages. As you approach Rongbuk, the massive North Face of Everest comes into view, offering a dramatic glimpse of what lies ahead. Upon arrival at Rongbuk, you’ll stay in basic accommodations such as tents or guesthouses. This is a critical acclimatization stop, as the altitude is beginning to become a factor. After settling in, you may take a short walk around the area to help with acclimatization, but it’s essential to rest and hydrate.
Day 4: Trek from Rongbuk to Everest Base Camp (5,200 meters / 17,060 feet)
Today marks the beginning of the climb itself, as you trek from Rongbuk to Everest Base Camp (EBC), which is located at 5,200 meters (17,060 feet). The 2‑hour trek follows a rough dirt path through a dry, rocky landscape. The journey offers incredible views of Everest’s massive North Face and the surrounding peaks. Upon reaching Base Camp, climbers are greeted with a sense of awe at the magnitude of the world’s highest peak. At EBC, you will meet your guides, check in for the acclimatization process, and spend time organizing gear. You’ll also set up camp and begin preparing for the higher-altitude rotations that will follow. The focus now shifts to acclimatizing and getting ready for the ascent to the higher camps.
Day 5: Acclimatization Day at Base Camp
A crucial part of the North Col Route climb is acclimatization. After arriving at Everest Base Camp, you’ll spend a full day resting and acclimatizing to the altitude. This is vital for avoiding altitude sickness. Throughout the day, you’ll hydrate, eat high-calorie meals, and rest. It’s also a good time to go through your gear one more time, checking everything to ensure you have what you need for the journey ahead. You’ll have the opportunity to walk around Base Camp, explore the area, and interact with other climbers, but you’ll mostly stay close to camp. Altitude adjustment is key, so don’t overexert yourself.
Day 6: Trek to Advanced Base Camp (6,400 meters / 21,000 feet)
Today, you will begin your ascent by trekking from Base Camp to Advanced Base Camp (ABC), which is located at 6,400 meters (21,000 feet). The trek takes about 4–5 hours, covering a distance of around 6 kilometers. As you climb, the terrain changes, and you’ll cross through glaciers, rocky ridges, and snowfields. The ascent is steep but manageable, with a gradual increase in altitude. Upon reaching ABC, you’ll set up camp and begin the process of acclimatizing to the higher elevation. The surrounding views are nothing short of spectacular, with Everest towering above. The physical demands of the day are significant, so it’s essential to take your time and hydrate well.
Day 7: Acclimatization Day at Advanced Base Camp
Another critical day for acclimatization, you’ll spend today at Advanced Base Camp to rest and prepare for the higher altitude camps. During the day, you may engage in light activities such as short walks to higher points, helping your body adjust to the thinning air. Resting, eating, and staying hydrated remain paramount. This day is also used for gear checks and preparation for the next phase of your climb. At this altitude, fatigue can set in quickly, so don’t push yourself too hard. Your guides will review summit plans and make sure all logistics are in place for the upcoming rotations to higher camps.
Day 8: Move to Camp 1 (7,000 meters / 22,965 feet)
Today, you will begin the climb to Camp 1, located at 7,000 meters (22,965 feet). The terrain is challenging, involving a mix of rock scrambling and glacier travel. The route will take you past crevasses and technical sections where fixed ropes are used. Camp 1 is typically set up on a rocky plateau, offering incredible views of Everest’s North Face. The camp is basic, but it offers essential shelter and rest after a long and taxing ascent. You will spend the night here to allow your body to adjust to the high altitude. The next day’s goal will be to push for Camp 2, but for now, focus on hydration and rest.
Day 9: Acclimatization Day at Camp 1
At Camp 1, you’ll spend another day to help your body adjust to the increased altitude. It’s important to avoid rushing your ascent and to allow your body to recover. Many climbers will take short hikes around the area to higher elevations, returning to Camp 1 to rest. Your guides will continue to monitor your progress and help you stay on track. The weather conditions at this altitude can be extreme, with high winds and low temperatures, so be sure to dress warmly and protect yourself from frostbite. The key is to prepare mentally and physically for the next stages of the climb.
Day 10: Move to Camp 2 (7,800 meters / 25,590 feet)
The climb to Camp 2 is often one of the most demanding on the North Col Route. Located at 7,800 meters (25,590 feet), Camp 2 is a staging area for the summit push. The route to Camp 2 involves a more technical climb, requiring climbers to navigate through rock faces, ice, and snow. The terrain is steeper and more challenging, with the Second Step presenting a formidable obstacle — a vertical rock face that requires the use of fixed ropes and a great deal of mountaineering skill. Once at Camp 2, climbers are only a few hundred meters from the final push to the summit.
Day 11: Acclimatization Day at Camp 2
Another crucial acclimatization day is spent at Camp 2. This allows your body to adjust to the altitude before pushing for higher camps. During this day, you’ll rest, hydrate, and check your gear for the final summit push. The weather can be harsh at this altitude, so it’s vital to be prepared for wind and snow. This is also a good time to do final mental preparations for the summit, as the psychological demands of the climb become more intense.
Day 12: Move to Camp 3 (8,300 meters / 27,230 feet)
From Camp 2, the climb to Camp 3 (8,300 meters / 27,230 feet) represents one of the most critical and challenging phases of the North Col Route. The terrain between Camp 2 and Camp 3 is particularly steep and technical, with mixed rock, ice, and snow. The most notorious section of this climb is the Second Step, a vertical rock face that requires climbers to use fixed ropes and specialized climbing techniques. This section tests climbers’ skills in rock and ice climbing and their mental fortitude.
The weather at this altitude can be extreme, with high winds, freezing temperatures, and rapid weather changes that make climbing slow and challenging. As you approach Camp 3, you’ll begin to feel the thinning air, which increases fatigue and makes each step feel heavier. Camp 3 is set up at a high, exposed location, offering minimal shelter from the elements. The main focus at Camp 3 is to rest and prepare for the final summit push. After reaching the camp, take time to hydrate, eat, and get as much rest as possible before the final ascent to the summit.
Day 13: Acclimatization Day at Camp 3
Today is an important acclimatization day at Camp 3. The altitude is pushing the limits of human endurance, so it’s crucial to allow your body time to adjust to the lack of oxygen. The thinner air means that even the simplest tasks require more energy, so be sure to rest and hydrate to conserve as much strength as possible. You may also do a short hike to a higher point to help with the acclimatization process. However, it is essential to avoid pushing your body too hard.
Weather conditions at this altitude are often extremely harsh, with freezing temperatures and strong winds. Take this time to check your gear and prepare your equipment for the summit push, ensuring that everything is functioning properly. Mentally, it’s important to focus on the final goal — summiting Everest — but also to stay present in the moment and respect the mountain’s demands. Use this day to gather your energy and make sure you’re mentally ready for the final stretch.
Day 14: Move to Camp 4 (8,400 meters / 27,560 feet)
Today’s goal is to reach Camp 4, located at 8,400 meters (27,560 feet). Camp 4 is the final high-altitude camp before the summit, and the ascent to it will take approximately 6–8 hours. The terrain is rugged, with a mixture of ice and snow, and the final push involves traversing a steep, challenging section of the Northeast Ridge. As climbers approach this high camp, they’ll experience the difficulties of extreme altitude, where breathing becomes more labored, and every step feels like a monumental effort.
At Camp 4, the weather can be harsh, with very cold temperatures and powerful winds. The air is incredibly thin, and oxygen levels are minimal, making it necessary to rely on supplemental oxygen. This is the last chance to rest before the final summit push, and the pressure of the impending summit is palpable. Make sure to rest, eat high-energy foods, and prepare mentally for the climb to the top. Keep in mind that summit day is not far away, and you’ll need to conserve all of your energy for the ascent.
Day 15: Summit Day Preparation
This day is reserved for final preparations for the summit push. You’ll wake up early at Camp 4, and the next steps will depend on the weather window and your physical condition. The night before the summit attempt, you’ll check your gear, ensure that your supplemental oxygen is properly set up, and mentally prepare for the long, grueling climb. Climbers may choose to rest and hydrate throughout the day, conserving energy for the summit attempt later.
The summit attempt is a monumental and physically exhausting endeavor, requiring patience, focus, and determination. If conditions permit, this will be the last chance to prepare everything before the climb to the summit begins in earnest. Many climbers will review their summit strategies with their guides and Sherpas, discussing when and how to push for the summit based on the conditions.
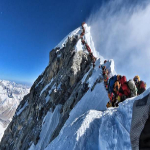
Day 16: Summit Push to the Top of Everest (8,848 meters / 29,029 feet)
Today is the day you’ve been waiting for — summit day. From Camp 4, climbers will begin their ascent to the top of Everest. The route begins at around 8,400 meters (27,560 feet), and you’ll navigate through the final sections of the Northeast Ridge, which can be icy and steep. The ascent is both physically and mentally taxing. With the extremely low oxygen levels, each step feels like a marathon, and fatigue can set in quickly.
As you approach the summit, you’ll encounter the Hillary Step, a technical rock face that demands focus and precision. This section requires fixed ropes and careful maneuvering. Climbers are often exhausted at this point, but the sheer drive to summit keeps them moving. The final push can take anywhere from 6 to 10 hours, depending on weather conditions, physical exhaustion, and the presence of other climbers.
Upon reaching the summit of Everest at 8,848 meters (29,029 feet), you’ll experience a sense of accomplishment unlike any other. The views from the summit are unparalleled, offering a 360-degree panorama of the entire Himalayan range. The climb to the top of the world is emotionally overwhelming, but it also comes with a deep respect for the mountain and its dangers. Stay at the summit for only a short time, as the conditions are harsh and you must conserve energy for the descent.
Day 17: Descend to Camp 4 (8,400 meters / 27,560 feet)
After spending a brief time on the summit, it’s time to descend back down to Camp 4. The descent is equally challenging due to the steep terrain, high altitude, and extreme weather conditions. Climbing down the Hillary Step and other technical sections requires careful attention and use of fixed ropes. The thin air can make descending just as difficult as ascending, so proceed cautiously.
Once you reach Camp 4, you’ll be able to relax and regain some strength, knowing that you’ve successfully summited the highest mountain on Earth. However, the journey is far from over, and climbers must still descend to lower camps to ensure a safe return.
Day 18: Descend to Camp 3 (8,300 meters / 27,230 feet)
Today, you’ll continue your descent, moving from Camp 4 to Camp 3 at 8,300 meters (27,230 feet). This section of the descent requires the same focus as the ascent, especially when negotiating the icy and rocky terrain. As you descend, the air begins to thicken, and your body will feel less fatigued. However, the descent should be done cautiously, as altitude sickness can still be a concern.
Day 19–22: Descend to Advanced Base Camp (6,400 meters / 21,000 feet)
Over the next few days, you’ll continue your descent through the higher camps, eventually reaching Advanced Base Camp (ABC). The descent takes several days due to the high altitude and challenging conditions, but the lower elevation makes it easier to breathe and recover. When you arrive at ABC, you can finally relax and focus on recovering from the mental and physical strain of the summit push.
Day 23–25: Return to Base Camp (5,200 meters / 17,060 feet)
Once you have descended to Advanced Base Camp, the final leg of the journey is to return to Base Camp. This trek will take another few days, offering a more leisurely pace compared to the ascent. Upon arrival at Base Camp, you’ll feel a great sense of accomplishment.
Final Thoughts
Summiting Mount Everest via the North Col Route from Tibet is a true test of mountaineering skill, endurance, and mental toughness. The route’s technical challenges, high-altitude conditions, and harsh weather make it a demanding climb that requires preparation, respect, and adaptability. Completing this climb, however, offers an unparalleled sense of achievement — the reward of standing atop the world’s highest peak.
— — —
Mount Everest: Need to Know, Top Tips & Best Photo Spots
Climbing Mount Everest is the ultimate mountaineering challenge. As the highest peak on Earth, standing at 29,032 feet (8,848 meters), Everest demands unparalleled physical and mental fortitude. The climb is long and difficult, requiring technical competence in ice, rock, and snow, along with the ability to manage extreme altitudes. The Everest experience is marked by breathtaking landscapes, unpredictable weather, and the constant risk of altitude sickness, so meticulous planning and acclimatization are essential to summit success.
Here’s everything you need to know to prepare for your Everest adventure:
Essential Gear List for Climbing Mount Everest
Clothing and Layering
- Down Jacket – A high-quality, insulated down jacket is essential for summit day, when temperatures can drop well below freezing. A jacket with a high warmth-to-weight ratio is critical at such high altitudes, where temperatures can reach ‑40°F (-40°C).
- Waterproof Outer Shell – Windproof and waterproof jacket and pants are critical to shield you from Everest’s unpredictable weather. The weather on Everest can change suddenly, and having reliable protection from rain, snow, and extreme winds is key.
- Mid-Layers – Fleece or synthetic insulation is necessary to manage your body temperature throughout the ascent. These layers help trap warmth while allowing moisture to evaporate, ensuring you stay comfortable during demanding sections of the climb.
- Base Layers – Moisture-wicking, thermal base layers are crucial for keeping you dry and comfortable as you ascend. Avoid cotton as it retains moisture, which can lead to chilling at high altitudes.
- Mountaineering Boots – High-quality, insulated boots are required to keep your feet warm and protected from the elements. Boots should be compatible with crampons and offer excellent grip on ice and snow.
- Gaiters – Gaiters are important for preventing snow from entering your boots and for added protection in deeper snow conditions. They provide extra warmth and prevent your legs from getting wet during the climb.
- Warm Hat and Balaclava – A good, insulated hat for summit day and a balaclava for face protection in high winds and cold temperatures are essential. These accessories keep your extremities warm and prevent frostbite.
- UV Sunglasses and Glacier Goggles – Essential for protecting your eyes from the intense UV rays and glare off the snow. At high altitudes, the sun’s rays are much stronger and can cause snow blindness.
- Waterproof Gloves and Mittens – Insulated gloves for climbing and summit attempts are necessary, with mittens for extra warmth during rest breaks. Always carry spare gloves in case they become wet or damaged.
Camping and Sleeping
- Four-season Tent – A sturdy, storm-resistant tent is vital for enduring high winds and extreme cold at Base Camp and higher camps. It should be able to withstand Everest’s unpredictable weather, including strong winds and snowstorms.
- High-Altitude Sleeping Bag – A sleeping bag rated for ‑40°F (-40°C) or colder is necessary. The high altitudes of Everest bring extreme cold temperatures, and a proper sleeping bag will keep you warm and rested.
- Sleeping Pad – An inflatable pad plus foam for added insulation and comfort during your stay on the mountain. At high altitudes, a quality sleeping pad will ensure you stay insulated from the cold ground.
- Stove and Fuel – A reliable cold-weather stove is necessary for melting snow to drink and preparing meals. It’s essential to have a stove that can function at extreme altitudes where temperatures can plummet.
- Cooking Gear – Compact and efficient cooking gear is key to reducing weight and maximizing space in your pack. Lightweight pots and utensils are vital for preparing quick, nutritious meals.
Technical and Climbing Gear
- Trekking Poles – Useful for stability on uneven terrain and during glacier crossings. Poles help you conserve energy and reduce the impact on your knees.
- Ice Axe – Essential for balance and self-arrest, especially on icy slopes and steeper sections. An ice axe can also be used to help with securing your position when traversing glaciers.
- Crampons – Crampons are required for secure footing on glaciers and snow-covered sections. They should fit your boots snugly and provide excellent traction on ice.
- Climbing Helmet – A helmet is essential for safety when traversing under glaciers, steep sections, or rocky areas. Helmets protect against falling rocks and ice debris, which are common hazards at high altitudes.
Miscellaneous Essentials
- Water Bottles and Insulated Containers – Wide-mouth bottles to prevent freezing, and insulated containers to keep liquids warm are important. At Everest’s high altitudes, water can freeze easily, so insulated bottles are a must.
- Headlamp – A strong headlamp with extra batteries for early starts or late finishes. It’s crucial to have reliable lighting for night-time navigation and when dealing with long summit days.
- Sunscreen and Lip Balm – High SPF sunscreen and lip balm to protect from UV exposure at high altitudes. Sunburn is a real risk on Everest, as UV rays are much stronger at higher altitudes.
- First Aid Kit – A small first aid kit including blister treatment, pain relievers, and altitude medications (like Diamox). Having the essentials on hand is important for dealing with minor injuries or altitude sickness.
- Dry Bags or Waterproof Stuff Sacks –Protect gear from moisture, particularly sleeping bags and clothing.
- Multitool or Knife – Handy for repairs, food prep, and other camp tasks. A multitool can serve multiple purposes, saving space and weight in your pack.
Elevation Profile Overview
Mount Everest stands at 29,032 feet (8,848 meters), requiring careful acclimatization for any climber. The ascent involves a series of camps, with gradual altitude gains.
- Base Camp sits at approximately 5,364 meters (17,598 feet).
- Camp I is located at around 6,065 meters (19,900 feet).
- - Camp II is at 6,500 meters (21,325 feet).
- - Camp III is at 7,470 meters (24,500 feet).
- - Camp IV is located at 7,950 meters (26,085 feet), just below the South Col.
- Summit is at 8,848 meters (29,032 feet).
Above 8,000 meters, climbers enter the “death zone,” where oxygen levels are dangerously low, and the risk of fatigue, frostbite, and other complications increases significantly.
Permit Information
Climbing Mount Everest requires a permit issued by the government of Nepal. Climbers must also obtain a climbing permit for the South Col Route.
- Permit Process: Permits are generally arranged through a registered trekking company. The process involves providing documentation of previous high-altitude climbing experience.
- Fees: The cost for the Everest climbing permit is substantial, especially for foreign climbers. Fees are typically higher during the peak season (pre-monsoon, March to May).
- Guided vs. Independent: Many climbers choose to climb with a guide, though it is possible to attempt the climb independently if you meet the necessary experience and equipment requirements.
- Group Size Limit: The government may impose limits on the number of climbers per team or expedition, and climbing teams are expected to follow these regulations for safety reasons.
Always ensure you have proper travel insurance, including evacuation coverage, and confirm the latest permit regulations from official sources before beginning your expedition.
Top Tips for a Successful Everest Climb
- Acclimatization is Key – Everest’s altitude can cause serious altitude sickness if you don’t pace yourself properly. Ensure you allow ample time to acclimatize at each camp and make rotations to help your body adjust to the thin air.
- Pack Smart – Keep your load light but efficient. You’ll need a lot of gear, but don’t overpack. Focus on items that provide maximum utility and warmth, and ensure they can withstand Everest’s conditions.
- Stay Hydrated – The dry, cold conditions can quickly lead to dehydration, so keep drinking fluids. It’s essential to stay hydrated to avoid altitude sickness and maintain your strength during the climb.
- Be Prepared for Weather Changes – Everest’s weather is unpredictable, and storms can arrive suddenly. Always be ready for snowstorms, extreme winds, and temperature fluctuations.
- Train for Endurance – Everest is a long climb, requiring physical and mental stamina. Include cardiovascular training, strength-building exercises, and altitude training in your preparation.
- Have a Contingency Plan – The summit push can often be delayed due to weather, exhaustion, or other factors. Make sure your itinerary is flexible, and be prepared to adjust your schedule as needed.
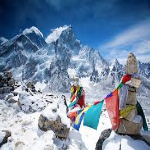
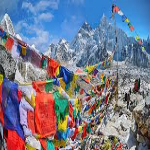
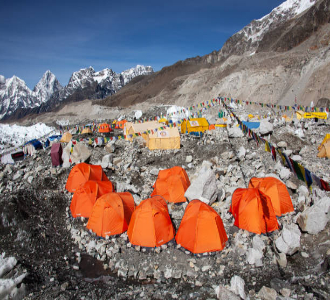
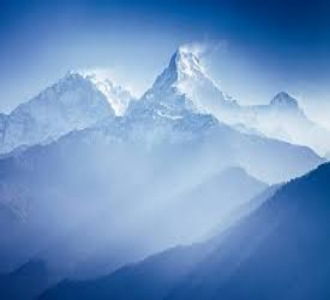
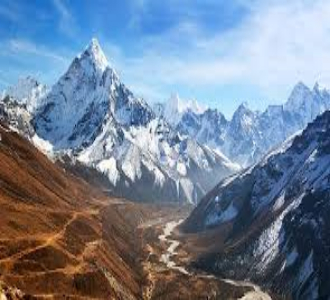
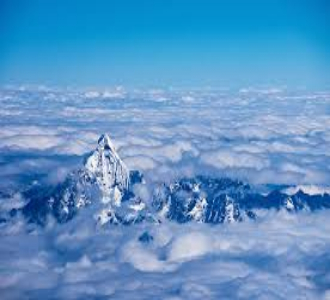
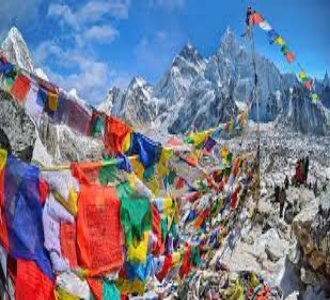
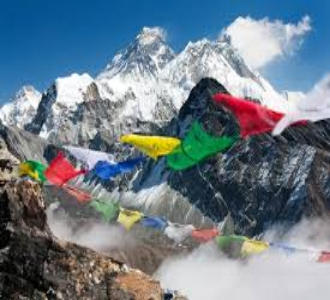
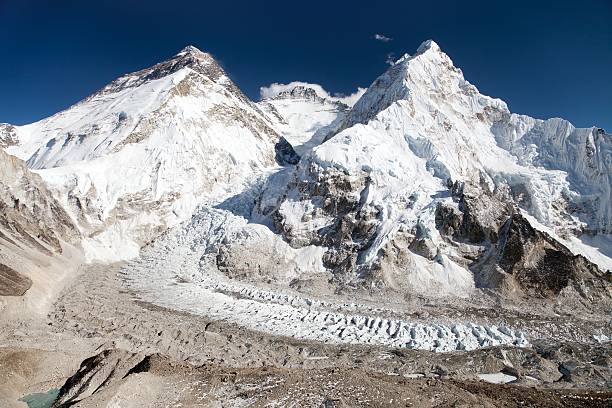
Best Photo Spot:
The summit of Mount Everest is the ultimate photo opportunity, offering 360-degree views of the surrounding Himalayan peaks. On a clear day, the panoramic vistas from the top are unforgettable, with the first light of sunrise casting a golden glow on the snow-covered mountains. Kala Patthar, just above Gorak Shep, is another iconic photo spot, providing stunning views of Everest’s south face, especially during sunrise when the mountain is bathed in soft, warm light. The Khumbu Icefall, with its dramatic seracs and crevasses, makes for striking images of the mountain’s raw, untamed beauty. Camp II, perched on the Lhotse Face, offers another incredible vantage point, where the icy terrain and the towering presence of Everest provide a breathtaking backdrop. Finally, Base Camp itself is an important photographic location, capturing the human side of the expedition, with climbers, Sherpas, and porters preparing for the climb, all set against the majestic Everest landscape. Each of these locations offers a unique perspective, showcasing both the natural beauty and the epic scale of the Everest climb.
The Travel Lantern:


