The World’s Greatest Multi-Day Hikes:
Taking on one of the World’s greatest Multi-Day hikes is no mean feat — but one that will not only see you not only conquer the best peaks, paths and coastlines on the planet, but immerse you in epic scenery, true adventure and life-changing experiences that push you — and nature — to the limit.
Representing the vest of wilderness adventure, multi-day hikes offer an immersive experience through some of the world’s most breathtaking landscapes. Yet, seeking out these hikes, and knowing what await you on the road ahead can be, at times, more challenging than the treks themselves. So to help you navigate the remote mountains, lush forests, unforgettable views and cultural encounters that lie ahead, as well as prepare you for the miles, endurance and challenges that await you on the road ahead, we’ve rounded out a comprehensive guide to the top 15 World’s Greatest Multi-Day Hikes, to help you get the most out of, and conquer these stunning journeys:
1.) Torres del Paine “O” Circuit (Chile, Patagonia): The Ultimate Patagonian Adventure

Overview: The Torres del Paine “O” Circuit is one of the most breathtaking and remote multi-day treks in the world, circling through the heart of Torres del Paine National Park in Chilean Patagonia. This 130-kilometer (80-mile) route takes hikers through glacier-fed rivers, wind-swept valleys, ancient forests, and dramatic mountain passes, offering a truly immersive wilderness experience.
Unlike the more popular “W” Trek, the “O” Circuit loops around the back of the park, leading to solitude, untouched landscapes, and jaw-dropping vistas. The trek’s highlight is the John Gardner Pass, where hikers get their first breathtaking view of the massive Grey Glacier, stretching as far as the eye can see. Wildlife encounters are common, with guanacos, condors, and even elusive pumas roaming the rugged terrain. Challenging yet rewarding, this trek is a must for experienced hikers looking for an unparalleled adventure in one of the world’s most stunning national parks.
Duration: The O Circuit typically takes 7 to 10 days to complete, depending on your pace and weather conditions. Unlike the shorter W Trek (4–5 days), this full circuit requires careful planning and endurance.
Location: Torres del Paine National Park, Magallanes Region, Chilean Patagonia.
How to Get There: The journey begins by flying into Punta Arenas (PUQ), Chile’s southernmost major airport. From there, take a bus or rental car to Puerto Natales (3–4 hours), the gateway town to Torres del Paine. Most hikers spend a night in Puerto Natales to gather supplies before taking a 2‑hour bus ride to the park’s entrance, where the adventure begins.
Budget Estimate: While the hike itself is free, there are several expenses to consider:
- Park entrance fee: ~$50 USD per person
- Camping fees & refugios: $10 – $120 USD per night (depending on campsite vs. lodge accommodation)
- Food & supplies: $100 – $250 USD for the entire trek
- Transportation:
- Buses: ~$30 – $50 USD round trip from Puerto Natales
- Flights to Punta Arenas: ~$200 – $600 USD (depending on departure location)
- Guided treks (optional): $1,500 – $3,000 USD per person
Best View Spot: The John Gardner Pass offers the most jaw-dropping view of Grey Glacier, one of the largest glaciers in South America. Reaching this high-altitude pass (1,200m / 3,940ft) provides an incredible panoramic perspective of the icy expanse below, making it one of the most memorable moments of the trek.
Photography Tips: Patagonia’s unpredictable weather and dramatic landscapes make photography a challenge but also an opportunity for stunning shots. To capture the best images, bring a weather-sealed camera or a high-quality smartphone with extra batteries, as cold temperatures drain battery life quickly. Mornings and late afternoons offer the best light for landscapes, while the golden glow on the Torres at sunrise is one of the most iconic sights in the park. For capturing the milky-blue glacial lakes and dramatic peaks, use a polarizing filter to enhance colors and reduce glare. Protect your gear from strong winds and rain with waterproof bags, and if shooting long exposures, bring a lightweight tripod.
Best Time to Go: The best time to hike the Torres del Paine “O” Circuit is during the Patagonian summer (November to March) when the weather is milder, and the days are long (up to 17 hours of daylight). However, strong winds and sudden rain showers are common year-round. The shoulder seasons (October & April) offer fewer crowds, but the risk of snow and extreme winds increases.
Expected Weather:
- Summer (Nov – Mar): Daytime: 10–20°C (50–68°F), Nighttime: 0–5°C (32–41°F)
- Winter (May – Sept, not recommended): Daytime: ‑5 to 5°C (23–41°F), Nighttime: ‑10°C (14°F) or lower
Patagonia is known for its rapidly changing weather, so always be prepared for wind, rain, and sudden temperature drops.
Recommended Gear:
- Waterproof hiking boots with strong ankle support
- Layered clothing (merino wool base layers, fleece, and a waterproof shell)
- Gloves, hat, and buff for wind protection
- High-quality rain gear (jacket & pants)
- Sleeping bag rated for cold temperatures
- Lightweight tent (if camping independently)
- Trekking poles (essential for steep and windy sections)
- Water filter or purification tablets (streams are clean, but purification is recommended)
- Plenty of snacks and high-energy foods
Top Tips for Completing the Hike: Preparation is key to successfully completing the O Circuit, as harsh weather, long distances, and remote terrain make this trek demanding. Book your campsites or refugios months in advance, as park regulations require reservations at designated sites. Train beforehand with endurance hikes carrying a full pack, as some days involve up to 10 hours of trekking through rugged terrain.
Weather in Patagonia is infamously unpredictable, so always be prepared for sudden storms and extreme winds. Start your hiking days early to avoid unpredictable afternoon weather and allow flexibility for delays. Since wild camping is prohibited, plan your daily mileage carefully to reach the next designated campsite. Lastly, leave no trace—pack out all trash and respect the pristine environment of this spectacular national park.
2.) Everest Base Camp Trek (Nepal): A Journey to the Foot of the World’s Highest Peak


6) The Overland Track (Australia, Tasmania): A Wilderness Adventure Through the Heart of Tasmania
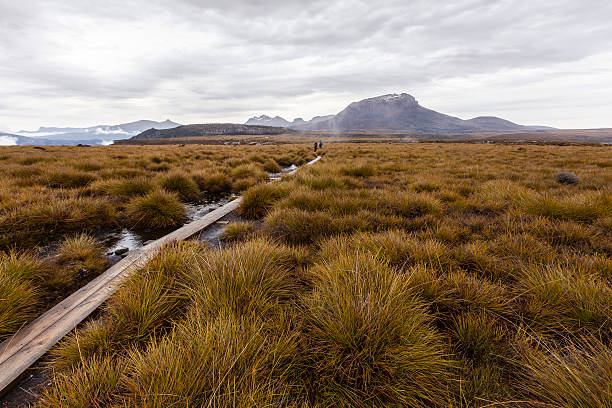
Overview: The Overland Track is Australia’s premier multi-day trek, spanning 65 km (40 miles) through the heart of Tasmania’s Cradle Mountain-Lake St Clair National Park. This iconic wilderness hike takes adventurers through ancient rainforests, alpine plateaus, glacial valleys, and stunning waterfalls, with the chance to spot wombats, echidnas, and even Tasmanian devils along the way.
This well-maintained trail is moderately challenging, with the option to summit side peaks like Cradle Mountain or Mount Ossa (Tasmania’s highest peak at 1,617m / 5,305 ft). The trail ends at Lake St Clair, Australia’s deepest freshwater lake, where hikers can either walk the final section or take a ferry across.
Duration: Most hikers complete the Overland Track in 5 to 6 days, though fit and experienced trekkers can finish in as few as 4 days.
Location: The Overland Track runs from Cradle Mountain to Lake St Clair, located in Cradle Mountain-Lake St Clair National Park, Tasmania, Australia.
How to Get There: Fly into Launceston (LST) or Hobart (HBA) Airports, then take a shuttle or drive to Cradle Mountain Visitor Centre, the trail’s starting point. At the finish, hikers can either walk or take the ferry across Lake St Clair before catching a shuttle or bus back to their starting location.
Budget Estimate:
- Overland Track Permit (mandatory, peak season): ~$200 USD per person
- Accommodation in Launceston or Hobart (before/after hike): $50 – $150 per night
- Ferry across Lake St Clair (optional): ~$50 USD per person
- Food and supplies: $100 – $200 for the trek
- Transport to and from trailheads: $50 – $100
Best View Spot: One of the most breathtaking panoramas is from Marion’s Lookout, offering sweeping views of Cradle Mountain and Dove Lake. For those up for a challenge, summiting Mount Ossa provides spectacular 360-degree views of Tasmania’s rugged wilderness.
Photography Tips: The Overland Track offers incredible diversity for photography, from misty rainforests and alpine lakes to dramatic mountain peaks. A wide-angle lens is best for capturing the vast landscapes, while a telephoto lens helps with wildlife photography. The soft morning and evening light at Cradle Mountain and Pelion Gap create stunning golden-hour shots. Be prepared for rain and moisture—bring a waterproof cover for your camera.
Best Time to Go: The best time to hike the Overland Track is between October and May, when the weather is milder and trail conditions are stable. However for those taking on the hike out of season, you can expect the following temperatures:
- Summer (Dec – Feb): Warmest weather, longer daylight hours, but more crowded.
- Autumn (Mar – May): Beautiful autumn foliage, fewer hikers, unpredictable weather.
- Spring (Oct – Nov): Wildflowers bloom, cooler temperatures, fewer crowds.
- Winter (Jun – Sept): Snow-covered landscapes but only for experienced hikers with winter gear.
Expected Weather:
Summer (Dec – Feb): 10–25°C (50–77°F), occasional rain and strong sun.
Winter (Jun – Sept): ‑2 to 10°C (28–50°F), possible snow and icy conditions.
Tasmania’s weather is highly unpredictable, with sudden temperature drops, heavy rain, and strong winds possible year-round.
Recommended Gear:
- Waterproof and windproof jacket and pants (Tasmania’s rain is frequent)
- Sturdy, waterproof hiking boots (essential for muddy and rocky sections)
- Warm layers (merino wool or fleece)
- Camping stove and food supplies (no food is available along the track)
- Sleeping bag (rated for below-freezing temperatures in colder months)
- Trekking poles (useful for uneven terrain and stream crossings)
- Headlamp with extra batteries
Top Tips for Completing the Hike: Prepare for all weather conditions, even in summer, as Tasmania’s climate is famously unpredictable. Book your Overland Track permit well in advance (mandatory in peak season) and secure a spot in the huts if not carrying a tent. While the huts provide basic shelter, carrying a tent is recommended in case they are full. Protect your food from wildlife—wombats and possums are notorious for raiding supplies. If tackling Mount Ossa, start early and watch for changing weather at the summit.
7) The Snowman Trek (Bhutan): The Ultimate Himalayan Challenge

Overview: The Snowman Trek is often considered one of the toughest and most remote high-altitude treks in the world. Spanning 200 miles (322 km) over 24–30 days, this epic journey crosses 11 mountain passes, many of which exceed 5,000 meters (16,400 feet) in elevation. The trail winds through Bhutan’s most isolated Himalayan valleys, offering unparalleled views of snow-capped peaks, glacial lakes, and Buddhist monasteries, while immersing trekkers in the country’s untouched culture and traditional way of life.
The trek is not just about endurance—it is a spiritual and cultural experience, taking hikers through ancient villages, yak pastures, and sacred dzongs (fortresses), with a backdrop of some of the highest unclimbed peaks in the world. Due to its extreme altitude and challenging terrain, only a few hundred people attempt it each year, making it one of the least-traveled and most exclusive treks on the planet.
Duration: The Snowman Trek typically takes 24–30 days to complete, depending on weather conditions and acclimatization needs.
Location: The trek begins in Paro or Drukgyel Dzong in western Bhutan and traverses through the remote Laya and Lunana regions, ending at Sephu in central Bhutan.
How to Get There: Travelers must fly into Paro International Airport (PBH), Bhutan’s only international airport. Flights are limited and operated only by Bhutanese airlines. Entry into Bhutan requires a government-approved tour package that includes permits, guides, and logistics. From Paro, trekkers travel to the starting point at Drukgyel Dzong by vehicle before beginning the trek.
Budget Estimate:
- Mandatory Bhutan visa & government daily tariff: ~$250–350 USD per day (includes accommodation, meals, and guide services)
- Trekking permits & logistics: ~$1,000+ USD for the Snowman Trek
- Round-trip flights to Bhutan: $600 – $1,500 USD (depending on departure location)
- Gear and equipment rental (if needed): $200 – $500 USD
- Optional tips for guides & support staff: ~$100 – $300 USD
Best View Spot: The most stunning viewpoints include Gangla Karchung Pass (5,120m / 16,800 ft), Jichu Drake Base Camp, and Thanza, where hikers can gaze upon the massive peaks of Gangkhar Puensum (7,570m / 24,836 ft)—the highest unclimbed mountain in the world.
Photography Tips: The Snowman Trek offers some of the most breathtaking high-altitude landscapes on Earth. Bring a telephoto lens for capturing distant peaks and wildlife, and a wide-angle lens to showcase vast Himalayan panoramas. Early morning and late afternoon light create the best contrast on glaciers and mountain ridges, while misty valleys and colorful Bhutanese prayer flags add depth to cultural shots. Cold temperatures and altitude can drain batteries quickly, so carry extra power banks.
Best Time to Go: The best time to attempt the Snowman Trek is in late September to mid-October, when the weather is most stable, and the skies are clearest.
- Spring (April – May): Warmer temperatures, blooming rhododendrons, but more unpredictable weather.
- Autumn (Sept – Oct): Best visibility, stable weather, and mild temperatures.
- Winter (Nov – March): Not recommended due to extreme cold and heavy snowfall blocking passes.
- Monsoon (June – Aug): Not recommended due to heavy rains, landslides, and leeches in lower regions.
Expected Weather
Daytime: 5°C – 15°C (41°F – 59°F) at lower elevations, but much colder at higher altitudes.
Nighttime: ‑10°C to ‑25°C (14°F to ‑13°F), with strong winds and occasional snowfall at high passes.
Recommended Gear:
- Four-season tent and high-altitude sleeping bag (rated to ‑20°C/-4°F or lower)
- Waterproof and insulated boots for rough terrain and snow
- Layered clothing system (thermal base layers, fleece, and down jacket)
- High-SPF sunscreen, sunglasses, and lip balm (intense UV exposure at altitude)
- Trekking poles for steep and icy sections
- Water purification tablets or a filtration system
- Oxygen canister or altitude sickness medication (if necessary)
Top Tips for Completing the Hike: Acclimatization is critical—spend extra days at higher altitudes to prevent altitude sickness. Trek with an experienced guide and support team, as the remote nature of the trail means no road access or rescue options for most of the route. Train well in advance, focusing on cardio, endurance, and high-altitude hiking experience. Bhutan’s strict tourism regulations require an organized trekking permit, so book your trek months in advance. Finally, embrace the cultural aspect of the journey—interact with local yak herders, monks, and villagers who call this remote region home.
8.) The Great Hikes of New Zealand:
New Zealand’s beauty lends itself to not one, but a multitude of incredible multi-day hikes, with the nine great hikes of New Zealand undoubtedly being the staple of international multi-day hiking. Whilst being a favourite is very much a matter of personal choice, we’ve rounded out our three favorites of the great nine hikes ;
8.1: Milford Track (New Zealand): The Finest Walk in the World

Overview: The Milford Track is often hailed as the finest walk in the world, and for good reason. This 53.5 km (33.2 miles) trek through Fiordland National Park is a spectacular journey across lush rainforests, alpine passes, glacial valleys, and cascading waterfalls, culminating at the breathtaking Milford Sound. The well-maintained trail follows in the footsteps of early explorers and offers hikers a mix of serene lakes, suspension bridges, and dramatic fjord views.
Along the way, trekkers encounter stunning highlights, including Clinton Valley, Mackinnon Pass (1,154m / 3,786 ft), and Sutherland Falls (580m / 1,903 ft)—one of the tallest waterfalls in New Zealand. The trail is one-way only, meaning hikers experience a true wilderness adventure with minimal crowds and an immersive backcountry experience.
Duration: The Milford Track takes 4 days and 3 nights to complete, following a set itinerary that includes designated huts for overnight stays.
Location: The trek is located in Fiordland National Park, South Island, New Zealand, starting at Glade Wharf near Te Anau and ending at Sandfly Point in Milford Sound.
How to Get There: Trekkers must travel to Te Anau, the gateway to Fiordland National Park. The journey typically involves flying into Queenstown Airport (ZQN), then taking a bus or rental car (2–3 hours) to Te Anau. From there, hikers board a boat across Lake Te Anau to Glade Wharf, where the trek begins. At the end of the hike, a boat from Sandfly Point transports trekkers to Milford Sound, where they can catch a bus back to Te Anau or Queenstown.
Budget Estimate:
- Milford Track Hut Pass (required for all hikers): $78 NZD per night (Great Walk season)
- Boat transport (Te Anau to trailhead & Sandfly Point to Milford Sound): $100 – $150 NZD
- Shuttle transport back to Te Anau/Queenstown: $50 – $100 NZD
- Accommodation in Te Anau (before/after the trek): $50 – $200 NZD per night
- Food and supplies for 4 days: $50 – $100 NZD
Best View Spot: The most breathtaking viewpoint is Mackinnon Pass, where hikers are rewarded with jaw-dropping panoramic views of glacial valleys and jagged peaks. Another incredible sight is Sutherland Falls, which plunges 580 meters (1,903 feet) from a glacier-fed lake above.
Photography Tips: Capturing the beauty of the Milford Track requires versatility and preparation. A wide-angle lens is best for expansive fjord landscapes, while a telephoto lens helps frame distant waterfalls and wildlife. Rain is common, so bring a waterproof camera cover or dry bag to protect your gear. The misty mornings create ethereal lighting, perfect for atmospheric rainforest shots. Be sure to arrive early at Mackinnon Pass for sunrise, when the golden light illuminates the mountains in a magical glow.
Best Time to Go: The best time to hike the Milford Track is during the Great Walks season (late October to April) when the trail is open, huts are staffed, and the weather is more stable.
- Spring (Oct – Nov): Lush landscapes and blooming wildflowers, but cooler temperatures.
- Summer (Dec – Feb): Warmest weather with long daylight hours, but also the busiest season.
- Autumn (Mar – Apr): Fewer crowds, crisp air, and vibrant foliage.
- Winter (May – Sept): Not recommended due to high avalanche risk, harsh weather, and limited services.
Expected Weather: Fiordland is one of the wettest places on Earth, with an annual rainfall of up to 7,000 mm (275 inches). Expect rain on most days, but also moments of stunning sunshine.
- Daytime temperatures: 10°C – 20°C (50°F – 68°F) in summer.
- Nighttime temperatures: 0°C – 10°C (32°F – 50°F), cooler at higher elevations.
- Rainfall: Frequent showers and mist, especially in the valleys.
Recommended Gear:
- Waterproof hiking boots (essential for muddy sections)
- Lightweight, moisture-wicking clothing (avoid cotton)
- Waterproof rain jacket & pants (a must for Fiordland’s wet climate)
- Warm fleece or down jacket for cooler evenings
- Hiking poles for river crossings and steep descents
- Quick-dry towel & biodegradable soap for hut stays
- Plenty of snacks & high-energy food (no food is provided in huts)
- Bug repellent (Sandflies can be relentless at lower elevations)
Top Tips for Completing the Hike: Due to its popularity, Milford Track hut bookings sell out months in advance, so reserve your spot early. Since the region is extremely wet, waterproof everything, including your backpack. Start each day early to maximize daylight and enjoy quieter trails before other hikers arrive. Be prepared for sudden weather changes, as sunshine can quickly turn into heavy rain and strong winds. Lastly, soak in the experience—listen to the waterfalls, breathe in the fresh rainforest air, and embrace the magic of Fiordland.
8.2: Routeburn Track (New Zealand): A High-Alpine Adventure
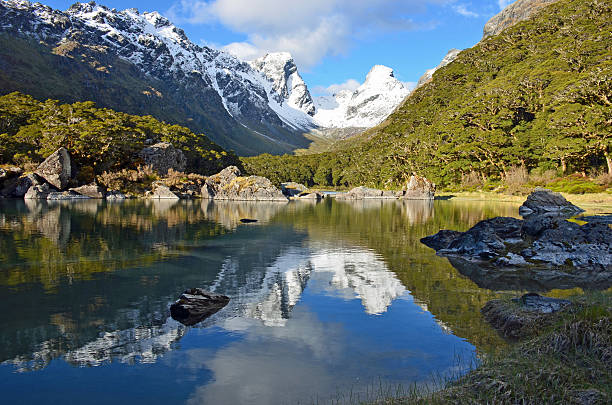
Overview: The Routeburn Track is one of New Zealand’s Great Walks, offering breathtaking alpine scenery, pristine rivers, cascading waterfalls, and stunning valley views. This 33 km (20.5 miles) trail connects Fiordland and Mount Aspiring National Parks, winding through lush beech forests, glacial valleys, and rugged mountain ridges. The track is famous for its diverse landscapes, ranging from mirror-like alpine lakes to dramatic peaks and waterfalls.
One of the highlights of the trek is Harris Saddle (1,255m / 4,117 ft), where hikers are rewarded with sweeping views of the Darran Mountains and Routeburn Valley. With well-maintained trails and backcountry huts, the Routeburn Track is a perfect mix of challenge and accessibility, making it one of the world’s most spectacular multi-day hikes.
Duration: The Routeburn Track typically takes 2 to 3 days to complete, depending on pace and overnight stays. Most hikers break the journey into two nights, staying in huts or campsites along the way.
Location: The Routeburn Track is located in Fiordland and Mount Aspiring National Parks on New Zealand’s South Island, running between the Routeburn Shelter (near Glenorchy) and The Divide (near Te Anau).
How to Get There: Since the Routeburn Track is a one-way trail, transport must be arranged for the start and finish. Most hikers fly into Queenstown Airport (ZQN) and travel to Glenorchy (1‑hour drive), where the Routeburn Shelter marks the beginning of the trail. At the end of the hike, The Divide is located 85 km from Te Anau. Shuttle services operate between Queenstown, Glenorchy, and Te Anau to help hikers complete the loop.
Budget Estimate:
- Hut fees (Great Walk season): $78 NZD per night
- Camping fees: $30 NZD per night
- Transport between trailheads: $50 – $150 NZD
- Accommodation in Queenstown/Te Anau (before or after hike): $50 – $200 per night
- Food and supplies for 2–3 days: $40 – $80 NZD
Best View Spot: The Harris Saddle viewpoint provides unparalleled panoramic views of Lake Harris, the Hollyford Valley, and distant snowcapped peaks. Another incredible sight is Earland Falls, a 174-meter (570-ft) waterfall cascading down the rugged cliffs along the track.
Photography Tips: A wide-angle lens is best for capturing the expansive alpine landscapes, especially at Harris Saddle. The track’s varied terrain offers stunning contrasts, from lush forests to open ridgelines, so adjust exposure settings accordingly. Mornings often bring low-hanging mist in the valleys, adding a dreamy atmosphere to photos. If hiking in autumn, the golden foliage creates a spectacular color contrast against the deep blue lakes and green alpine meadows.
Best Time to Go: The best time to hike the Routeburn Track is between late October and April, when the weather is more stable and the huts are open.
- Spring (Oct – Nov): Snow may still be present on higher sections, but fewer crowds and vibrant green valleys make it a beautiful time to hike.
- Summer (Dec – Feb): Warmer weather, long daylight hours, and peak hiking season.
- Autumn (Mar – Apr): Fewer crowds, stunning golden hues, and cooler temperatures.
- Winter (May – Sept): Not recommended unless experienced, as avalanches, snow, and extreme weather make the track hazardous.
Expected Weather: The Routeburn Track is in an alpine environment, meaning the weather can change suddenly. Expect rain on most days, with cold temperatures at night.
- Daytime temperatures: 10°C – 20°C (50°F – 68°F) in summer.
- Nighttime temperatures: 0°C – 10°C (32°F – 50°F), with potential frost in higher elevations.
- Rainfall: Frequent rain and strong winds, especially near Harris Saddle.
Recommended Gear:
- Waterproof hiking boots (essential for river crossings and muddy sections)
- Moisture-wicking layers & thermal base layers for warmth
- Waterproof jacket & pants (necessary for Fiordland’s unpredictable rain)
- Warm hat & gloves (temperatures can drop, even in summer)
- Plenty of high-energy snacks & meals (no food is available in huts)
- Bug repellent (sandflies are common in valleys)
Top Tips for Completing the Hike: Due to high demand, huts and campsites book out months in advance, so secure your spot early. Since the track is a point-to-point hike, arrange transport before starting. Start each hiking day early to avoid afternoon rain showers, which are common in Fiordland. Prepare for unpredictable weather, as conditions can shift from sunny to stormy within minutes. Finally, take your time at Harris Saddle—the views are among the most breathtaking in New Zealand.
8.3: Kepler Track (New Zealand): A Spectacular Alpine Loop

Overview: The Kepler Track is one of New Zealand’s Great Walks, offering a stunning multi-day loop through Fiordland National Park. This 60 km (37-mile) trek takes hikers across mountain ridges, through lush beech forests, past limestone formations, and alongside pristine lakes and rivers. Unlike other historic trails in Fiordland, the Kepler Track was purpose-built to showcase the area’s best landscapes, making it one of the most scenic and well-structured hikes in New Zealand.
One of the standout sections of the hike is the ridge walk between Luxmore Hut and Iris Burn Hut, where hikers enjoy panoramic views of Lake Te Anau, Mount Luxmore, and the rugged Kepler Mountains. With well-maintained trails, cozy backcountry huts, and a well-planned route, the Kepler Track provides a perfect balance of challenge and accessibility for hikers looking to experience New Zealand’s backcountry.
Duration: Most hikers complete the Kepler Track in 3 to 4 days, depending on their pace and hut availability. The route is a loop, so there’s no need to arrange transport to different trailheads.
Location: The Kepler Track is located in Fiordland National Park on New Zealand’s South Island, starting and ending at the Kepler Track Car Park, near Te Anau.
How to Get There: Most hikers fly into Queenstown Airport (ZQN) and take a 2‑hour drive or bus ride to the town of Te Anau, the gateway to Fiordland National Park. The Kepler Track begins just outside of Te Anau, with the Kepler Track Car Park and the Control Gates marking the official trailhead. Shuttle services are available for those needing transport to and from town.
Budget Estimate:
- Hut fees (Great Walk season): $78 NZD per night
- Camping fees: $30 NZD per night
- Accommodation in Te Anau (before/after hike): $50 – $200 per night
- Food and supplies for 3–4 days: $60 – $120 NZD
- Transport to Te Anau: $50 – $100 NZD (bus or rental car)
Best View Spot: The ridgeline between Luxmore Hut and Iris Burn Hut offers incredible panoramic views of Lake Te Anau, the surrounding Fiordland mountains, and the vast wilderness beyond. Another must-see is the view from Mount Luxmore Summit (1,472m / 4,829 ft), which can be reached via a short detour from the main trail.
Photography Tips: The Kepler Track’s ridge sections provide some of the best alpine photography opportunities in New Zealand, especially at sunrise and sunset. Carry a wide-angle lens to capture the sweeping mountain vistas. If hiking in autumn (March – May), the golden hues of the beech forests create a stunning contrast against the deep blue waters of Lake Te Anau. Wildlife enthusiasts should keep a camera ready for kea (alpine parrots), New Zealand falcons, and glowworms in limestone caves near Luxmore Hut.
Best Time to Go: The best time to hike the Kepler Track is between late October and April, when the huts are open, and the trail is clear of heavy snow.
- Spring (Oct – Nov): Cool temperatures, fewer crowds, and lush green valleys.
- Summer (Dec – Feb): Warmest weather, long daylight hours, and peak hiking season.
- Autumn (Mar – Apr): Fewer hikers, beautiful golden beech forests, and cooler temperatures.
- Winter (May – Sept): Not recommended unless experienced, as the alpine ridges can be covered in deep snow and ice.
Expected Weather: Fiordland National Park is known for unpredictable weather, with frequent rain, strong winds, and cold temperatures, even in summer.
- Daytime temperatures: 10°C – 20°C (50°F – 68°F) in summer.
- Nighttime temperatures: 0°C – 10°C (32°F – 50°F), with frost possible at higher elevations.
- Rainfall: Frequent rain, particularly near Iris Burn Valley.
Recommended Gear:
- Sturdy waterproof hiking boots (necessary for wet and muddy sections)
- Moisture-wicking base layers & thermal clothing
- Waterproof jacket & pants (essential for Fiordland’s unpredictable rain)
- Hat & gloves (cold temperatures at night, even in summer)
- Plenty of high-energy snacks & lightweight meals
- Bug repellent (sandflies are common in lower valleys)
Top Tips for Completing the Hike: Book your huts months in advance, as they fill up quickly during peak season. Start early each day to avoid afternoon rain, which is common in Fiordland. If possible, hike counterclockwise for an easier final day, as the descent from Iris Burn Hut is long and steep. Prepare for changing weather conditions, as Fiordland’s alpine climate can shift suddenly. Lastly, take your time on the ridgeline section—the views are among the best of any Great Walk in New Zealand.
9.) GR20 (Corsica, France): Europe’s Toughest Long-Distance Trek
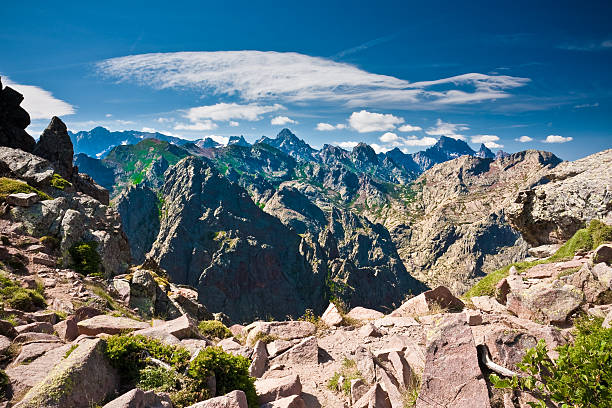
Overview: The GR20 is often considered Europe’s most challenging long-distance trek, stretching 180 km (112 miles) from Calenzana in the north to Conca in the south. This epic route crosses the rugged spine of Corsica, featuring dramatic mountain ridges, steep ascents, and breathtaking landscapes. The trail is a true test of endurance, requiring technical scrambling, river crossings, and navigating Corsica’s wild terrain.
Despite its difficulty, the GR20 is also one of the most rewarding treks in the world. Hikers are treated to jagged granite peaks, alpine lakes, waterfalls, and lush forests, all while experiencing Corsica’s unique blend of French and Italian culture. Basic refuges and mountain huts provide accommodation along the route, offering a rustic yet authentic trekking experience.
Duration: The GR20 takes approximately 15 days to complete, though experienced hikers may finish in 12–14 days. The trek is divided into two sections:
- Northern section (Calenzana to Vizzavona): The more difficult half, featuring steep ascents, exposed ridges, and technical scrambles.
- Southern section (Vizzavona to Conca): Slightly easier, with rolling hills, pine forests, and fewer technical sections.
Location: The GR20 runs north to south through Corsica, starting in Calenzana (near Calvi) and ending in Conca (near Porto-Vecchio).
How to Get There: Most hikers fly into Bastia-Poretta Airport (BIA) or Calvi Airport (CLY) and take a bus or taxi to Calenzana, the northern trailhead. Those starting in the south can fly into Figari Airport (FSC) and travel to Conca. Vizzavona, the midpoint of the trek, has a train station connecting to Bastia and Ajaccio for those hiking only half the trail.
Budget Estimate:
- Mountain refuge stays: €15 – €25 per night
- Camping fees: €6 – €10 per night (if camping near refuges)
- Food (hut meals or supplies): €10 – €20 per day
- Transport to trailhead (bus/taxi): €10 – €50
- Optional baggage transport (for those not carrying a full pack): €100 – €150 for the entire trek
Best View Spot: The Cirque de la Solitude (though now bypassed due to safety concerns) and the Asco-Stagnu to Tighjettu section offer some of the most jaw-dropping alpine scenery in Corsica. Another must-see viewpoint is the Bocca di Palmente, where hikers can see all the way to the Mediterranean Sea on a clear day.
Photography Tips: The GR20 offers stunning landscape photography, from rugged granite peaks to emerald-green alpine lakes. The best lighting occurs at sunrise and sunset, particularly from high mountain passes like Bocca Piccaia. Carry a lightweight zoom lens to capture both distant peaks and close-up details of Corsica’s unique rock formations. Be prepared for harsh lighting at midday and consider using a polarizing filter to reduce glare from rocks and water.
Best Time to Go: The best months to hike the GR20 are June to September, when snow has melted from high passes and refuges are open.
- June: Cooler temperatures, fewer hikers, but lingering snow in high sections.
- July – August: Peak season, warmer weather, but crowded huts and busy trails.
- September: Fewer crowds, pleasant weather, but shorter daylight hours.
- October – May: Not recommended due to snow and dangerous conditions in high-altitude areas.
Expected Weather: Corsica’s mountain climate is unpredictable, with intense sun, strong winds, and sudden storms.
- Summer daytime: 15°C – 30°C (59°F – 86°F), but cooler at higher altitudes.
- Nighttime: 5°C – 15°C (41°F – 59°F), with frost possible in early summer.
- Rainfall: Sudden thunderstorms, especially in the afternoons.
Recommended Gear:
- Sturdy, well-broken-in hiking boots (many rocky sections)
- Trekking poles (essential for steep ascents and descents)
- Lightweight sleeping bag (for staying in refuges)
- Plenty of snacks and high-energy food (food supplies are limited at huts)
- Sun protection (hat, sunglasses, sunscreen)
- Water purification tablets (streams are common, but not always safe to drink)
- Climbing gloves (useful for gripping chains and rocks in scrambling sections)
Top Tips for Completing the Hike: The GR20 is physically demanding, so train with a loaded backpack before attempting it. Start early each day to avoid afternoon heat and thunderstorms. Book refuge spots in advance during peak season, as they fill up quickly. If carrying a full pack, pack light, as steep ascents and descents make heavy loads exhausting. Lastly, be prepared for changing conditions, as the GR20 is as unpredictable as it is beautiful.
10.) The Annapurna Circuit (Nepal): A Himalayan Classic

Overview: The Annapurna Circuit is one of the most iconic multi-day treks in the world, offering a spectacular journey through diverse landscapes, from lush subtropical forests to high-altitude mountain passes. Covering 160–230 km (100–145 miles) depending on the chosen route, this trek encircles the Annapurna Massif, showcasing dramatic gorges, terraced rice fields, Tibetan-style villages, and snow-capped peaks.
The trek’s crown jewel is the Thorong La Pass (5,416m / 17,769 ft), the highest point on the route, where trekkers are rewarded with breathtaking panoramic views of the Himalayas. Along the way, hikers experience Nepali and Tibetan culture, visiting ancient monasteries, prayer wheels, and remote mountain villages. With well-established teahouse accommodations, the Annapurna Circuit is a challenging yet accessible trek for adventurers from around the world.
Duration: The Annapurna Circuit typically takes 12 to 18 days, depending on the exact route and side trips. Some trekkers shorten the trek by using jeeps or flights, while others extend their journey with side treks to Tilicho Lake or Annapurna Base Camp.
Location: The Annapurna Circuit loops through central Nepal, passing through Lamjung, Manang, and Mustang districts, with its highest point at Thorong La Pass.
How to Get There: Most trekkers fly into Kathmandu (Tribhuvan International Airport — KTM) and travel by bus or private jeep to Besisahar, the traditional starting point. Many now begin further along at Jagat or Chame, depending on road conditions. The trek ends in Jomsom or Nayapul, where trekkers can take a flight, bus, or jeep back to Pokhara or Kathmandu.
Budget Estimate:
- Trekking permits (TIMS & ACAP): $50 – $60
- Accommodation (teahouses): $5 – $15 per night
- Meals: $5 – $10 per meal
- Transport (bus/jeep to/from trailhead): $10 – $50
- Optional guide/porter: $25 – $40 per day
- Total estimated budget: $500 – $1,500 (depending on trek style and duration)
Best View Spot: The Thorong La Pass offers the most breathtaking panoramic views, with a stunning backdrop of Annapurna, Dhaulagiri, Manaslu, and the Tibetan plateau. Another must-see viewpoint is Poon Hill, which provides an epic sunrise over the Himalayas.
Photography Tips: The Annapurna Circuit is a photographer’s dream, with everything from lush valleys to towering peaks. The best lighting is during sunrise and sunset, especially from Thorong La Pass and Poon Hill. Bring a wide-angle lens to capture the grand mountain landscapes and a zoom lens for distant peaks and local culture shots. Be prepared for dusty conditions in lower areas and cold temperatures at high altitudes, which can affect battery life—carry extra batteries and keep them warm.
Best Time to Go: The best seasons for trekking the Annapurna Circuit are pre-monsoon (March–May) and post-monsoon (September–November).
- March–May (Spring): Warmer temperatures, blooming rhododendrons, and clear views.
- September–November (Autumn): Best visibility, dry trails, and pleasant temperatures.
- December–February (Winter): Snowy conditions at Thorong La Pass, making it difficult or impassable.
- June–August (Monsoon): Heavy rain, leeches, and landslides, but lush green landscapes in lower elevations.
Expected Weather: Weather varies by altitude:
- Low altitudes (1,000–2,500m / 3,280–8,200 ft): 10°C – 25°C (50°F – 77°F), with mild conditions.
- Mid-altitudes (2,500–4,000m / 8,200–13,100 ft): 0°C – 15°C (32°F – 59°F), cooler and drier.
- High altitudes (4,000–5,416m / 13,100–17,769 ft): ‑10°C to ‑20°C (14°F to ‑4°F), with strong winds and possible snow.
Recommended Gear:
- Sturdy, waterproof hiking boots (well broken-in)
- Layered clothing (base layer, fleece, insulated jacket, waterproof shell)
- Sleeping bag (-10°C / 14°F rated) for colder nights in teahouses
- Trekking poles (essential for high passes and descents)
- Sunglasses, sunscreen, and hat (for high-altitude sun exposure)
- Water purification tablets (to avoid buying plastic bottles)
- Portable power bank (limited electricity in some villages)
Top Tips for Completing the Hike: Acclimatization is key—take rest days in Manang to avoid altitude sickness before crossing Thorong La Pass. Start trekking early each day to avoid strong afternoon winds, which can be especially harsh at higher elevations. Drink plenty of water, eat well, and avoid alcohol to help with acclimatization. Hiring a guide or porter can enhance the experience, especially for navigation and carrying loads. Lastly, respect local customs and support sustainable tourism by staying in locally owned teahouses.
11.) The Pacific Crest Trail (USA, West Coast): A Legendary Long-Distance Trek
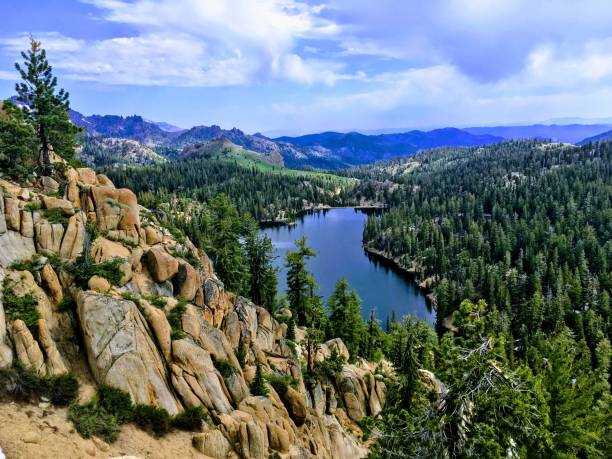
Overview: The Pacific Crest Trail (PCT) is one of the most iconic long-distance hikes in the world, stretching 4,270 km (2,650 miles) from the Mexican border in California to the Canadian border in Washington. Passing through California, Oregon, and Washington, the trail traverses an incredible variety of landscapes, including deserts, alpine peaks, volcanic craters, deep forests, and glacial valleys.
Hiking the full PCT is a major commitment, typically taking four to six months to complete. However, many adventurers opt for shorter sections, such as the John Muir Trail in California or the Oregon segment. Whether thru-hiking or section-hiking, the PCT offers an unparalleled journey through some of North America’s most stunning wilderness areas.
Duration: The full Pacific Crest Trail takes 4–6 months to complete, depending on pace and weather conditions. Section hikes can range from a few days to several weeks, depending on the chosen route.
Location: The PCT runs from Campo, California (on the Mexico border), to Manning Park, British Columbia (Canada), passing through California, Oregon, and Washington.
How to Get There: The trail begins at Campo, California, near San Diego, and ends in Manning Park, British Columbia. Hikers typically fly into San Diego (SAN) or Seattle (SEA) for transportation to trailheads. The most popular resupply towns along the route include Lake Tahoe, Ashland, Bend, and Cascade Locks.
Budget Estimate:
- Permits (PCT Long-Distance Permit): Free, but required for thru-hikers
- Food & resupply: $1,000 – $2,500 per month
- Gear costs (initial setup): $1,500 – $3,500
- Accommodation (town stays, hostels, hotels): $500 – $1,500
- Total estimated budget for a thru-hike: $5,000 – $10,000
Best View Spot: The Sierra Nevada section, particularly near Yosemite and the John Muir Trail, offers some of the most breathtaking mountain views on the trail. Other highlights include Crater Lake in Oregon, the Goat Rocks Wilderness in Washington, and the North Cascades.
Photography Tips: Capturing the diverse landscapes of the PCT requires a mix of wide-angle shots for grand vistas and zoom lenses for wildlife. The golden hours of sunrise and sunset provide the best lighting, especially in alpine regions. Cloud inversions in Washington and California’s desert sunrises offer dramatic photo opportunities. Keeping camera gear lightweight is crucial for long-distance hikers—many opt for compact mirrorless cameras or high-quality smartphones.
Best Time to Go: The best time for a northbound thru-hike is April to September, starting in California’s desert before the summer heat peaks and finishing before Washington’s autumn snowfall. Southbound hikers typically begin in late June or July to avoid deep snow in the North Cascades.
- California Desert (April–May): Hot days, cool nights, limited water sources
- Sierra Nevada (June–July): Snowmelt, river crossings, and stunning alpine scenery
- Oregon (July–August): Milder terrain, wildflowers, and volcanic landscapes
- Washington (August–September): Rugged terrain, potential early snowfall
Expected Weather: Weather varies dramatically across the PCT:
Southern California Desert: 5°C–35°C (40°F–95°F), very dry
Sierra Nevada Mountains: ‑5°C–25°C (23°F–77°F), risk of snow
Oregon & Washington: 0°C–20°C (32°F–68°F), cooler and wetter in fall
Recommended Gear:
- Ultralight backpacking gear (tent, sleeping bag, sleeping pad)
- Trail runners or lightweight hiking boots (preferred by most thru-hikers)
- Sun protection (hat, sunglasses, sunscreen)
- Water filter or purification system (crucial for desert sections)
- Bear-proof food storage (bear canister or Ursack)
- Lightweight rain gear and insulation for colder sections
- Trekking poles for stability on varied terrain
Top Tips for Completing the Hike: Hiking the PCT requires careful planning and adaptability. Resupply logistics are crucial—many hikers mail food drops to remote towns. Water sources are scarce in the desert, so carry extra capacity. Trail angels provide support, but hikers should be self-sufficient. Take rest days (zero days) in trail towns to avoid burnout, and listen to your body to prevent injuries.
12.) The Camino de Santiago (Spain & France): A Pilgrimage Through History

Overview: The Camino de Santiago, also known as The Way of St. James, is one of the most famous long-distance walks in the world, drawing thousands of pilgrims, adventurers, and history enthusiasts each year. The network of trails leads to the Santiago de Compostela Cathedral in Spain, where the remains of St. James are believed to be buried.
While there are multiple routes, the most popular is the Camino Francés, a 780-km (485-mile) journey starting in Saint-Jean-Pied-de-Port, France, and crossing northern Spain. Other well-known routes include the Camino Portugués, the Camino del Norte, and the Via de la Plata. Whether for spiritual reasons, cultural exploration, or the love of walking, the Camino offers an unforgettable experience through charming villages, rolling vineyards, and medieval towns.
Duration: The Camino Francés takes 4–6 weeks to complete, depending on pace and rest days. Shorter routes, such as the Camino Portugués, can be done in 2–4 weeks, while some trekkers complete the last 100 km from Sarria to Santiago in just 5–7 days.
Location: The Camino consists of multiple routes, but the most famous is the Camino Francés, which runs from Saint-Jean-Pied-de-Port, France, to Santiago de Compostela, Spain. Other routes originate in Portugal, southern Spain, and along the northern coast.
How to Get There: To reach the Camino Francés starting point, fly into Biarritz Airport (BIQ) or Pamplona Airport (PNA) and take a train or bus to Saint-Jean-Pied-de-Port. To begin in Portugal, fly into Lisbon (LIS) or Porto (OPO). Once in Santiago de Compostela, travelers can fly out of Santiago de Compostela Airport (SCQ) or take a train to Madrid or Barcelona.
Budget Estimate:
- Pilgrim’s Passport (Credencial del Peregrino): ~€2–€5
- Daily accommodation (albergues, hostels, hotels): €5–€50 per night
- Food and drinks: €10–€30 per day
- Optional luggage transport service: €3–€5 per stage
- Total estimated budget: €700–€2,000 (depending on accommodation and dining choices)
Best View Spot: The Alto del Perdón, just outside Pamplona, offers one of the most iconic views of the Camino, with a metal pilgrim sculpture overlooking the rolling hills of Navarra. The Cruz de Ferro is another famous stop, where pilgrims leave stones as symbols of their journey.
Photography Tips: Capture the essence of the Camino by documenting daily life, from sunrises over misty villages to bustling pilgrim hostels. Golden-hour shots of the rolling landscapes of Castilla y León add depth to photos. The final arrival at Santiago de Compostela Cathedral is a moment worth capturing—consider taking both wide-angle shots of the square and close-up images of emotional pilgrims finishing their journey.
Best Time to Go: The Camino is best hiked in spring (April–June) and fall (September–October) when temperatures are mild and crowds are smaller. Summer (July–August) is popular but can be hot, especially in central Spain, while winter (November–March) is quieter but brings cold and rainy weather.
- Spring: Pleasant weather, blooming flowers, fewer crowds
- Summer: Long daylight hours, peak crowds, hot in central Spain
- Fall: Cooler temperatures, stunning autumn colors, fewer pilgrims
- Winter: Quietest season, but some albergues may be closed
Expected Weather
- Northern Spain (April–June, Sept–Oct): 10°C–25°C (50°F–77°F), occasional rain
- Central Spain (July–August): 20°C–35°C (68°F–95°F), dry and hot
- Galicia (March–November): 5°C–20°C (41°F–68°F), frequent rain
Recommended Gear
- Comfortable, lightweight hiking shoes (well-broken-in)
- Backpack (30–40L) with minimal weight
- Moisture-wicking clothes and layers for changing weather
- Sleeping bag or liner for albergues
- Pilgrim’s Passport (Credencial) for accommodations and stamps
- Reusable water bottle and snacks
- Basic first-aid kit and foot care supplies (for blisters!)
Top Tips for Completing the Hike: Take rest days when needed, as overexertion leads to injuries. Start early in the morning to avoid the heat and secure a bed in albergues. Pack light—many first-time pilgrims overpack and regret it. Embrace the journey, meet fellow travelers, and soak in the spiritual and cultural experience. Finally, don’t rush—the Camino is not just about the destination but about the experience itself.
13.) The Drakensberg Grand Traverse (South Africa & Lesotho): A Wild and Remote Expedition
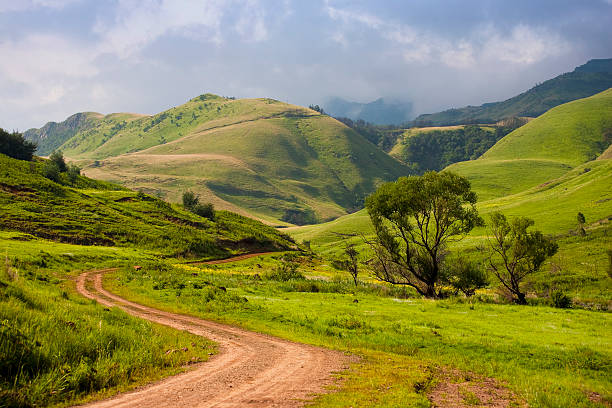
Overview: The Drakensberg Grand Traverse is one of Africa’s most challenging and rewarding long-distance hikes, stretching over 230 km (143 miles) through the breathtaking Drakensberg Mountains, which form the natural border between South Africa and Lesotho. Unlike traditional marked trails, this trek requires navigational skills, self-sufficiency, and a strong sense of adventure, as hikers traverse rugged peaks, deep valleys, and high-altitude plateaus.
This off-the-grid wilderness experience offers an unparalleled sense of solitude, with dramatic basalt cliffs, cascading waterfalls, and sweeping views of the KwaZulu-Natal province and Lesotho’s remote highlands. Hikers will tackle six major peaks, including Mafadi (3,450m / 11,319 ft), the highest peak in South Africa. With no official trail or designated campsites, the journey is a true test of endurance, survival skills, and love for raw, untouched nature.
Duration: Most trekkers complete the Drakensberg Grand Traverse in 10–14 days, depending on weather conditions, fitness level, and route variations. Some experienced ultra-hikers complete it in as little as 5–7 days, but this requires intense endurance and light packing.
Location: The trek starts at The Sentinel Car Park in the northern Drakensberg and ends at Bushman’s Nek Border Post in the south, covering a vast expanse of the uKhahlamba-Drakensberg Park, a UNESCO World Heritage Site.
How to Get There: To reach the starting point, fly into King Shaka International Airport (DUR) in Durban or OR Tambo International Airport (JNB) in Johannesburg. From there, rent a car or take a shuttle to the Sentinel Car Park, the northern entry point. At the trek’s end at Bushman’s Nek, arrange a pickup or take local transport back to Durban or Johannesburg.
Budget Estimate:
- Park entry permits: ~$20–$30 USD
- Transport (car rental/shuttle): $50–$200 USD
- Camping gear & supplies: $300–$600 USD
- Food & resupplies for 10–14 days: $100–$200 USD
- Guide (optional but recommended for first-timers): $500–$1,000 USD
- Total estimated budget: $500–$1,500 USD
Best View Spot: The Amphitheatre Escarpment, near the start of the trek, offers jaw-dropping views over the Royal Natal National Park. Another iconic viewpoint is Mafadi Summit, where the rugged peaks of Lesotho and the Drakensberg stretch endlessly in all directions.
Photography Tips: Capturing the vast, untamed beauty of the Drakensberg Grand Traverse requires patience and the right gear. Sunrise and sunset create stunning golden light on the towering cliffs and rolling grasslands. The Tugela Falls (one of the world’s highest waterfalls) near the beginning of the trek is a must-photograph feature. Bring a wide-angle lens to capture the scale of the mountains and a lightweight tripod for night shots—Drakensberg’s remote location offers some of the best stargazing in Africa.
Best Time to Go: The best seasons for the Drakensberg Grand Traverse are spring (September–November) and autumn (March–May) when temperatures are moderate, and conditions are relatively stable.
- Summer (December–February): Warm days, but frequent thunderstorms and heavy rains make river crossings risky.
- Winter (June–August): Cold temperatures and possible snowfall, requiring specialized winter gear.
Expected Weather
- Daytime: 10°C–25°C (50°F–77°F) in summer; 0°C–15°C (32°F–59°F) in winter
- Nighttime: 0°C–10°C (32°F–50°F) in summer; ‑5°C to ‑15°C (23°F–5°F) in winter
- Frequent weather changes: Expect sudden rain, high winds, and extreme temperature fluctuations.
Recommended Gear
- GPS device and maps (essential for navigation)
- Lightweight but durable tent and sleeping bag (4‑season recommended in winter)
- Water filtration system or purification tablets (streams are available but may be contaminated)
- Layered clothing for extreme weather shifts
- High-energy food and snacks for self-sufficiency
- Sturdy hiking boots with good ankle support
- Trekking poles for steep ascents and descents
- Satellite phone or emergency beacon (due to remote terrain)
Top Tips for Completing the Hike: Since the Drakensberg Grand Traverse is unmarked, it requires strong navigation skills—hikers should be comfortable using GPS, maps, and compasses. Water sources are limited, so plan refills at known streams and carry adequate purification methods. The terrain is rugged, so train with a loaded pack before attempting the trek. Wild camping is necessary, so be prepared for complete self-sufficiency. Finally, watch out for extreme weather, as sudden storms and freezing temperatures can be life-threatening.
14.) The West Coast Trail (Canada, British Columbia): A Legendary Coastal Trek
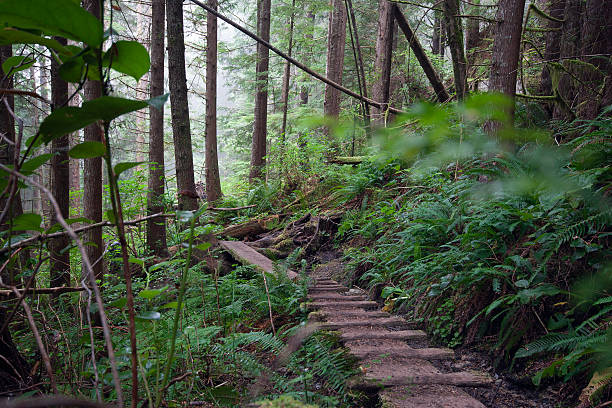
Overview: The West Coast Trail (WCT) is one of the most iconic and challenging multi-day hikes in the world, stretching 75 km (47 miles) along the rugged coastline of Vancouver Island, British Columbia. Originally established as a lifesaving route for shipwreck survivors, the trail now attracts adventurous hikers eager to experience its dense rainforests, dramatic sea cliffs, tidal pools, waterfalls, and remote beaches.
This physically demanding trek features river crossings, suspension bridges, wooden ladders, and sections of deep mud, making it an exhilarating challenge for those prepared for the elements. Despite the difficulty, the rewards are immense—stunning ocean views, rich wildlife (bald eagles, sea lions, whales, and black bears), and the unique opportunity to camp on pristine beaches beneath the stars.
Duration: Most hikers complete the West Coast Trail in 5–7 days, depending on fitness level, weather conditions, and whether they hike north to south or vice versa.
Location: The trail runs between Gordon River (Port Renfrew) in the south and Pachena Bay (Bamfield) in the north, passing through Pacific Rim National Park Reserve on Vancouver Island’s remote west coast.
How to Get There: The two main trailheads are Gordon River (south) and Pachena Bay (north). The closest major city is Victoria, BC. To get to the trail, fly into Victoria International Airport (YYJ) or Vancouver International Airport (YVR) and take a bus or drive to Port Renfrew or Bamfield. A shuttle service operates between the trailheads for those finishing at the opposite end from where they started.
Budget Estimate:
- Permit Fee: ~$150–$200 CAD per person
- Ferry crossings on the trail: ~$20 CAD
- Transportation (shuttle/bus): ~$100–$150 CAD
- Camping gear & food: ~$300–$600 CAD
- Total estimated cost: $500–$1,000 CAD
Best View Spot: Tsusiat Falls, a breathtaking waterfall cascading onto the beach, is one of the most photogenic and refreshing stops along the trek. Other unforgettable spots include Owen Point’s sea caves, the ladders at Logan Creek, and the stunning views from Carmanah Lighthouse.
Photography Tips: Capturing the beauty of the West Coast Trail requires careful planning. Golden hour on the beach campsites provides magical lighting, while long exposure shots of waterfalls and ocean waves can create dreamy effects. A waterproof bag is essential to protect your camera from the frequent rain and mist. Wildlife photography is also a highlight—keep your camera ready for whales, bears, and bald eagles.
Best Time to Go: The best time to hike the West Coast Trail is from May to September, when the trail is open and maintained. June to August offers the best weather and longest daylight hours, but it’s also the busiest time. May and September provide a quieter experience, but trails may be wetter and more challenging.
Expected Weather:
- Summer (June–August): 10°C–20°C (50°F–68°F), with frequent rain showers
- Spring/Fall (May, September): 5°C–15°C (41°F–59°F), colder nights, more rain
- Rain is common year-round, so be prepared for muddy and slippery conditions.
Recommended Gear:
- Waterproof hiking boots and gaiters (essential for muddy sections)
- Quick-dry clothing and rain gear (rain is almost guaranteed)
- Trekking poles for balance on slippery terrain
- Bear spray and proper food storage (bears and cougars inhabit the area)
- Dry bags to protect electronics and food
- Lightweight tent and sleeping bag for beach camping
- Water purification system (rivers and streams are your main water sources)
Top Tips for Completing the Hike: The West Coast Trail is as much about preparation as it is about endurance. Train with a heavy pack beforehand, as the ladders, river crossings, and mud can be exhausting. Start early each day to navigate tide-dependent sections safely. Study tide charts carefully, as some parts of the trail are impassable at high tide. Expect wet conditions, even in summer—embrace the rain and mud rather than trying to avoid them. Lastly, book your permits early, as spaces fill up fast due to the trail’s popularity.
15.) Kungsleden (Sweden, Lapland): A Journey Through the Arctic Wilderness
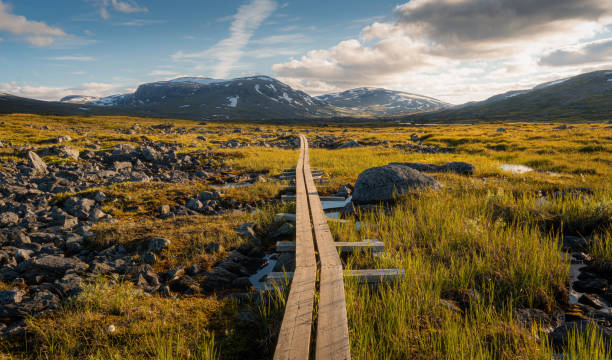
Overview: Kungsleden, or “The King’s Trail,” is Sweden’s most famous long-distance hike, stretching 440 km (270 miles) through the stunning wilderness of Swedish Lapland. This legendary trek takes hikers through a pristine Arctic landscape of glacial valleys, dramatic mountains, birch forests, and expansive tundra, passing through four national parks and some of Europe’s most untouched scenery.
While the full route takes about a month, most hikers choose to complete shorter sections, with the 110 km (68-mile) stretch from Abisko to Nikkaluokta being the most popular. Along the way, trekkers stay in mountain huts, cross suspension bridges, and—if lucky—witness the Northern Lights in autumn or the Midnight Sun in summer.
Duration: The full 440 km (270-mile) Kungsleden takes around 3–4 weeks to complete, while the most popular Abisko to Nikkaluokta section typically takes 5–7 days.
Location: Kungsleden runs from Abisko in the north to Hemavan in the south, cutting through Swedish Lapland and Sarek National Park, one of Europe’s last true wilderness areas.
How to Get There: Most hikers begin in Abisko, accessible via train from Stockholm (18–20 hours) or a flight to Kiruna Airport (KRN), followed by a train or bus to Abisko. If finishing at Nikkaluokta, a bus service connects hikers to Kiruna. For those starting in the south, Hemavan is reachable by domestic flights or long-distance buses from Stockholm.
Budget Estimate:
- Mountain huts: ~$40–$60 USD per night (optional)
- Camping: Free (except in national park rest areas)
- Food & supplies: ~$15–$30 USD per day
- Transport (flights/trains/buses): ~$150–$300 USD
- Total estimated cost: $400–$1,000 USD, depending on accommodation choices
Best View Spot: The Tjäktja Pass (1,150 m / 3,770 ft), the highest point on the trail, offers breathtaking panoramic views of the Arctic valleys and surrounding peaks. Ammarnäs and Kvikkjokk also offer stunning viewpoints, especially in autumn when the landscape turns fiery red and gold.
Photography Tips: Kungsleden offers a photographer’s paradise with dramatic mountain landscapes, expansive valleys, and endless skies. The golden hues of autumn (September) provide striking contrast, while summer’s Midnight Sun creates unique lighting conditions. Bring a wide-angle lens for capturing vast landscapes and a telephoto lens for Arctic wildlife like reindeer and moose. If hiking in autumn, a tripod is essential for capturing the Northern Lights.
Best Time to Go: The best time to hike Kungsleden is late June to early September. July and August offer the best weather, long daylight hours, and open huts, while September brings fewer crowds, autumn colors, and a chance to see the Northern Lights. Winter hiking is possible but requires ski touring experience.
Expected Weather:
- Summer (June–August): 5°C–20°C (41°F–68°F), mostly dry but occasional rain
- Autumn (September): 0°C–10°C (32°F–50°F), colder nights, stunning foliage
- Winter (October–May): ‑10°C to ‑30°C (14°F to ‑22°F), deep snow and extreme conditions
Recommended Gear
- Waterproof hiking boots (essential for river crossings and muddy trails)
- Lightweight but warm layers (temperatures fluctuate widely)
- Rain jacket and pants (rain and wind are common)
- Mosquito repellent (summer months can be buggy)
- Tent and sleeping bag (if not staying in huts)
- Portable stove and food supplies (huts sell some food, but options are limited)
Top Tips for Completing the Hike: Kungsleden is well-marked and relatively easy in terms of navigation, but preparation is key. Book huts in advance during peak season if you don’t plan to camp. Carry a mosquito net and repellent in summer, as the Arctic mosquitoes can be relentless. Be prepared for rapidly changing weather, even in summer—storms, high winds, and sudden temperature drops are common. If you’re looking for a true Arctic adventure, consider hiking in September for fewer crowds and the chance to see the Northern Lights.
Happy Multi-Day Tramping ! — and whilst being sure to stay safe and healthy, enjoying these incredible multi-day treks !
